Quickstart
Use IBM Bob to build a web UI for an existing Node.js Express API and run it in Docker, using modes, the approval workflow, and agentic iteration.
Introduction
IBM Bob is an AI software development lifecycle (SDLC) partner that augments your existing workflows. In this tutorial, you start with an existing TypeScript Express REST API that manages to-do lists and use Bob to build a web UI on top of it. You do not need experience in Node.js, React, or TypeScript to complete this tutorial.
Key features you learn
You use the following three core capabilities of Bob to build the UI:
- Modes: Specialized personas that tailor Bob's behavior for specific tasks.
- Approval workflow: Review Bob plans before they run.
- Iterating with Bob: Have a conversation with Bob to refine work after you see the result.
Prerequisites
To complete this tutorial, you need the following:
IBM Bob IDE
Download and install the IBM Bob application on your computer. Bob is a standalone IDE application and not an extension.
Docker
Use Docker to run containerized builds. Docker prevents you from having to install Node.js or dependencies locally. If you do not have Docker, you can use an alternative container management tool such as Podman.
Git
Install Git to clone the example repository. Bob uses Git to clone repositories directly from the IDE.
Set up your workspace
Launch IBM Bob and clone the example repository to begin working with the Node.js application.
Launch IBM Bob
Launch the IBM Bob application on your computer.
Open the Bob chat interface
If the Bob chat interface is not visible, open it by clicking the Bob icon beside the navigation bar or use the shortcut Option + Command + B (Mac) or Ctrl + Alt + B (Windows).

You interact with Bob by typing natural language requests in the input field.
Clone the tutorial repository
Clone the repository containing the example application using the following steps:
- Click the files icon in the top-left corner of the Bob IDE panel.
- Click Clone Repository and paste the following repository URL.
- When Bob asks where to save the repository, choose any location you like.
https://github.com/IBM/bob-demo.git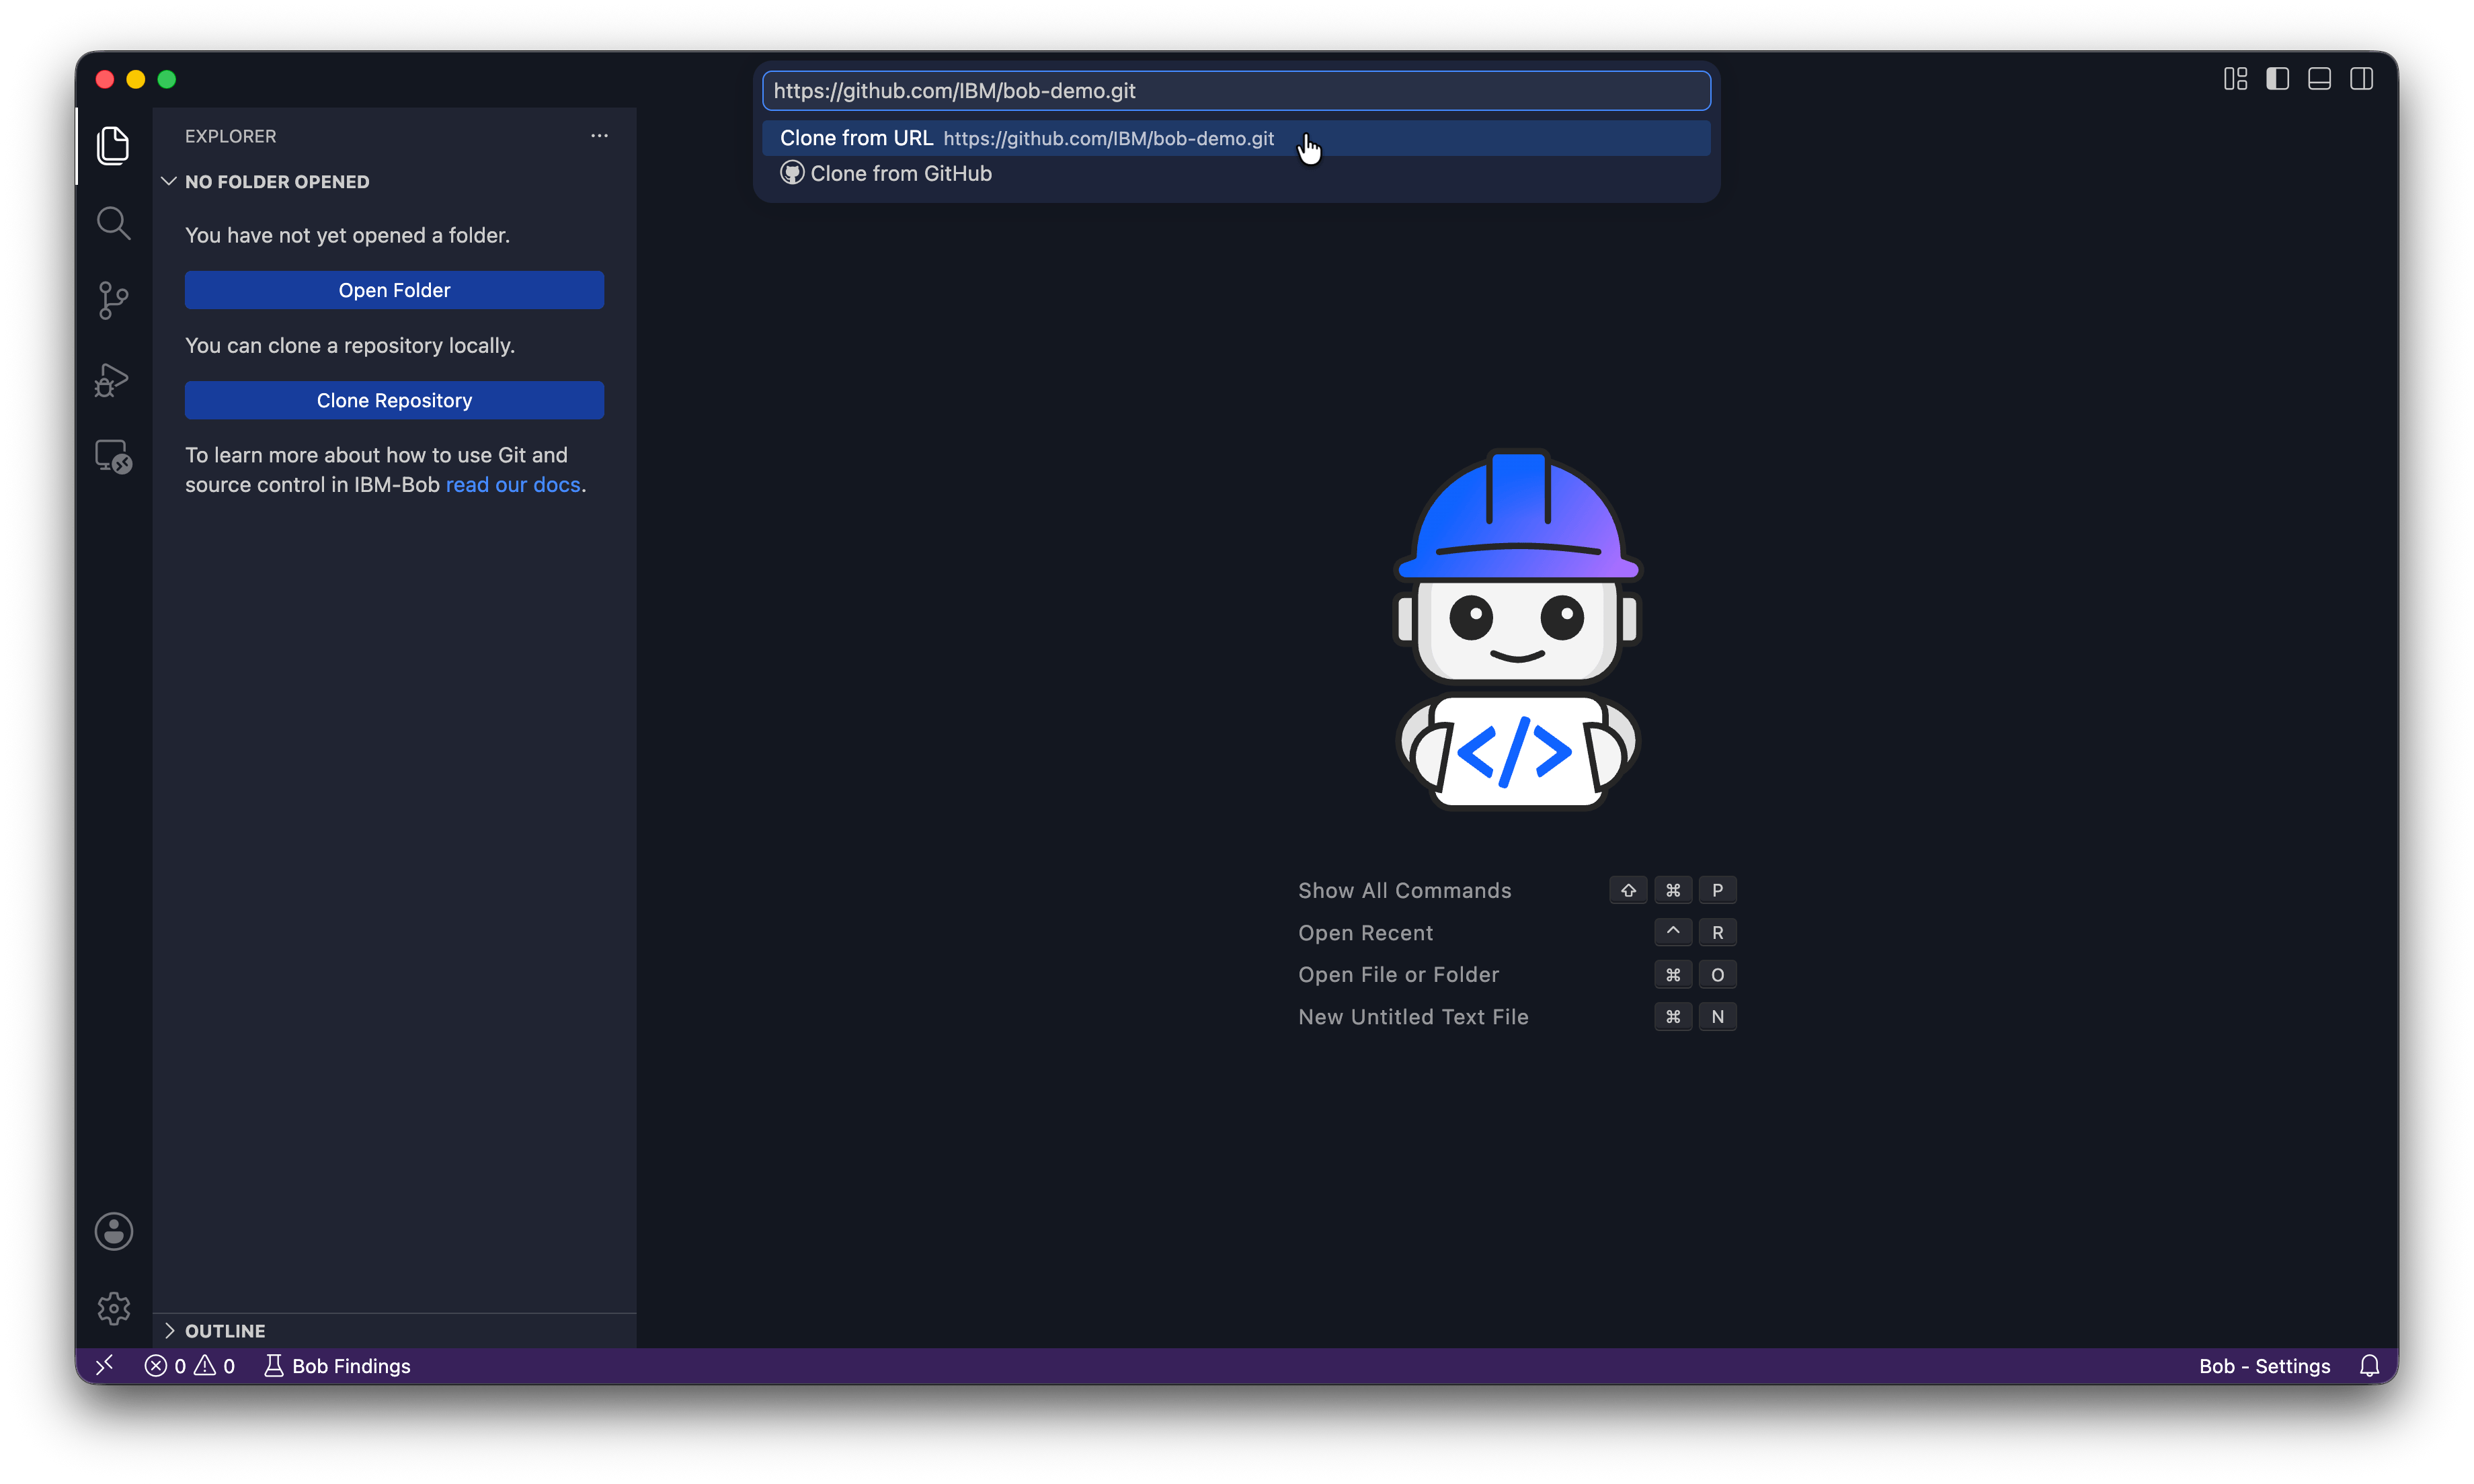
Open the repository
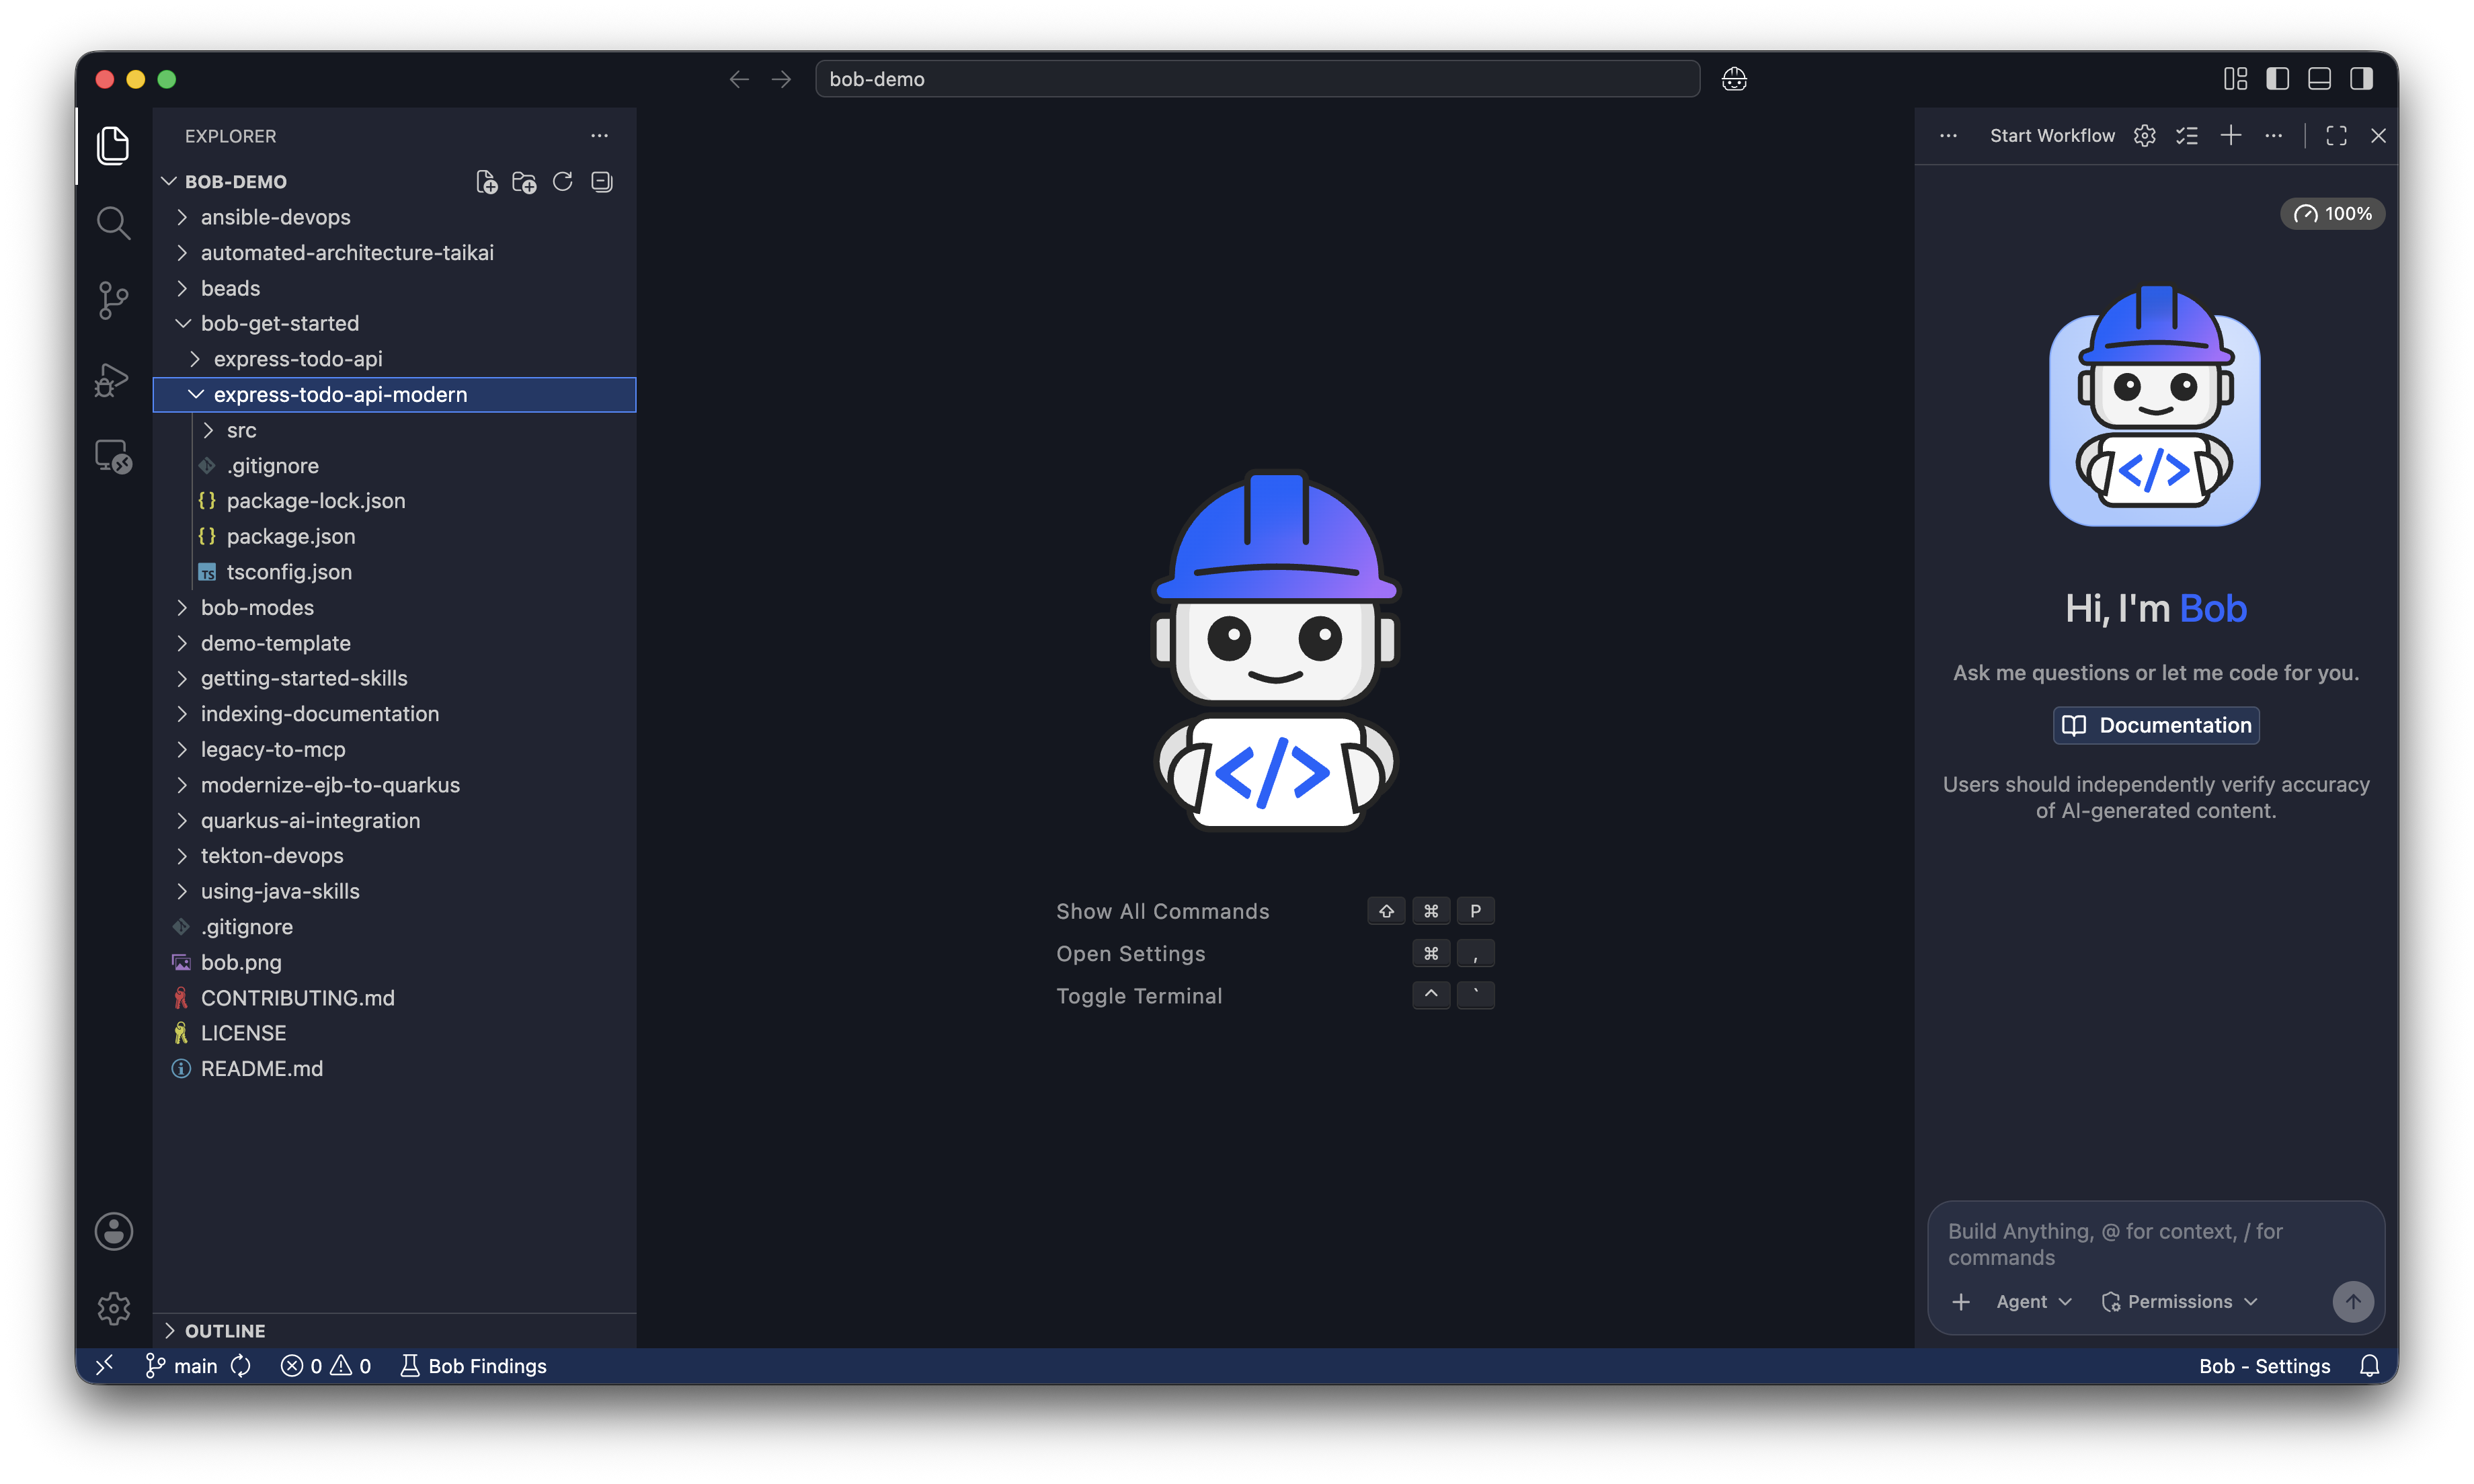
When Bob asks you if you want to open the cloned repository click Open. If Bob asks "Do you trust the authors of the files in the folder?", click Yes, I trust the authors.
The explorer shows the project files, and the Bob chat panel opens on the side. You work out of the bob-get-started/express-todo-api-modern folder.
Navigate to the project
In the Bob chat input field, run the following prompt to navigate to the express-todo-api-modern folder. Bob asks you to let it run the change directory command. Click Run to let Bob change directories.
Navigate to the bob-get-started/express-todo-api-modern folder.
Bob confirms it navigated to the directory and describes the contents.
Explore the API with Ask mode
Before changing anything, switch to Bob's Ask mode. Click the mode selector drop-down to the left of the chat input field and select Ask, or type /ask in the chat.
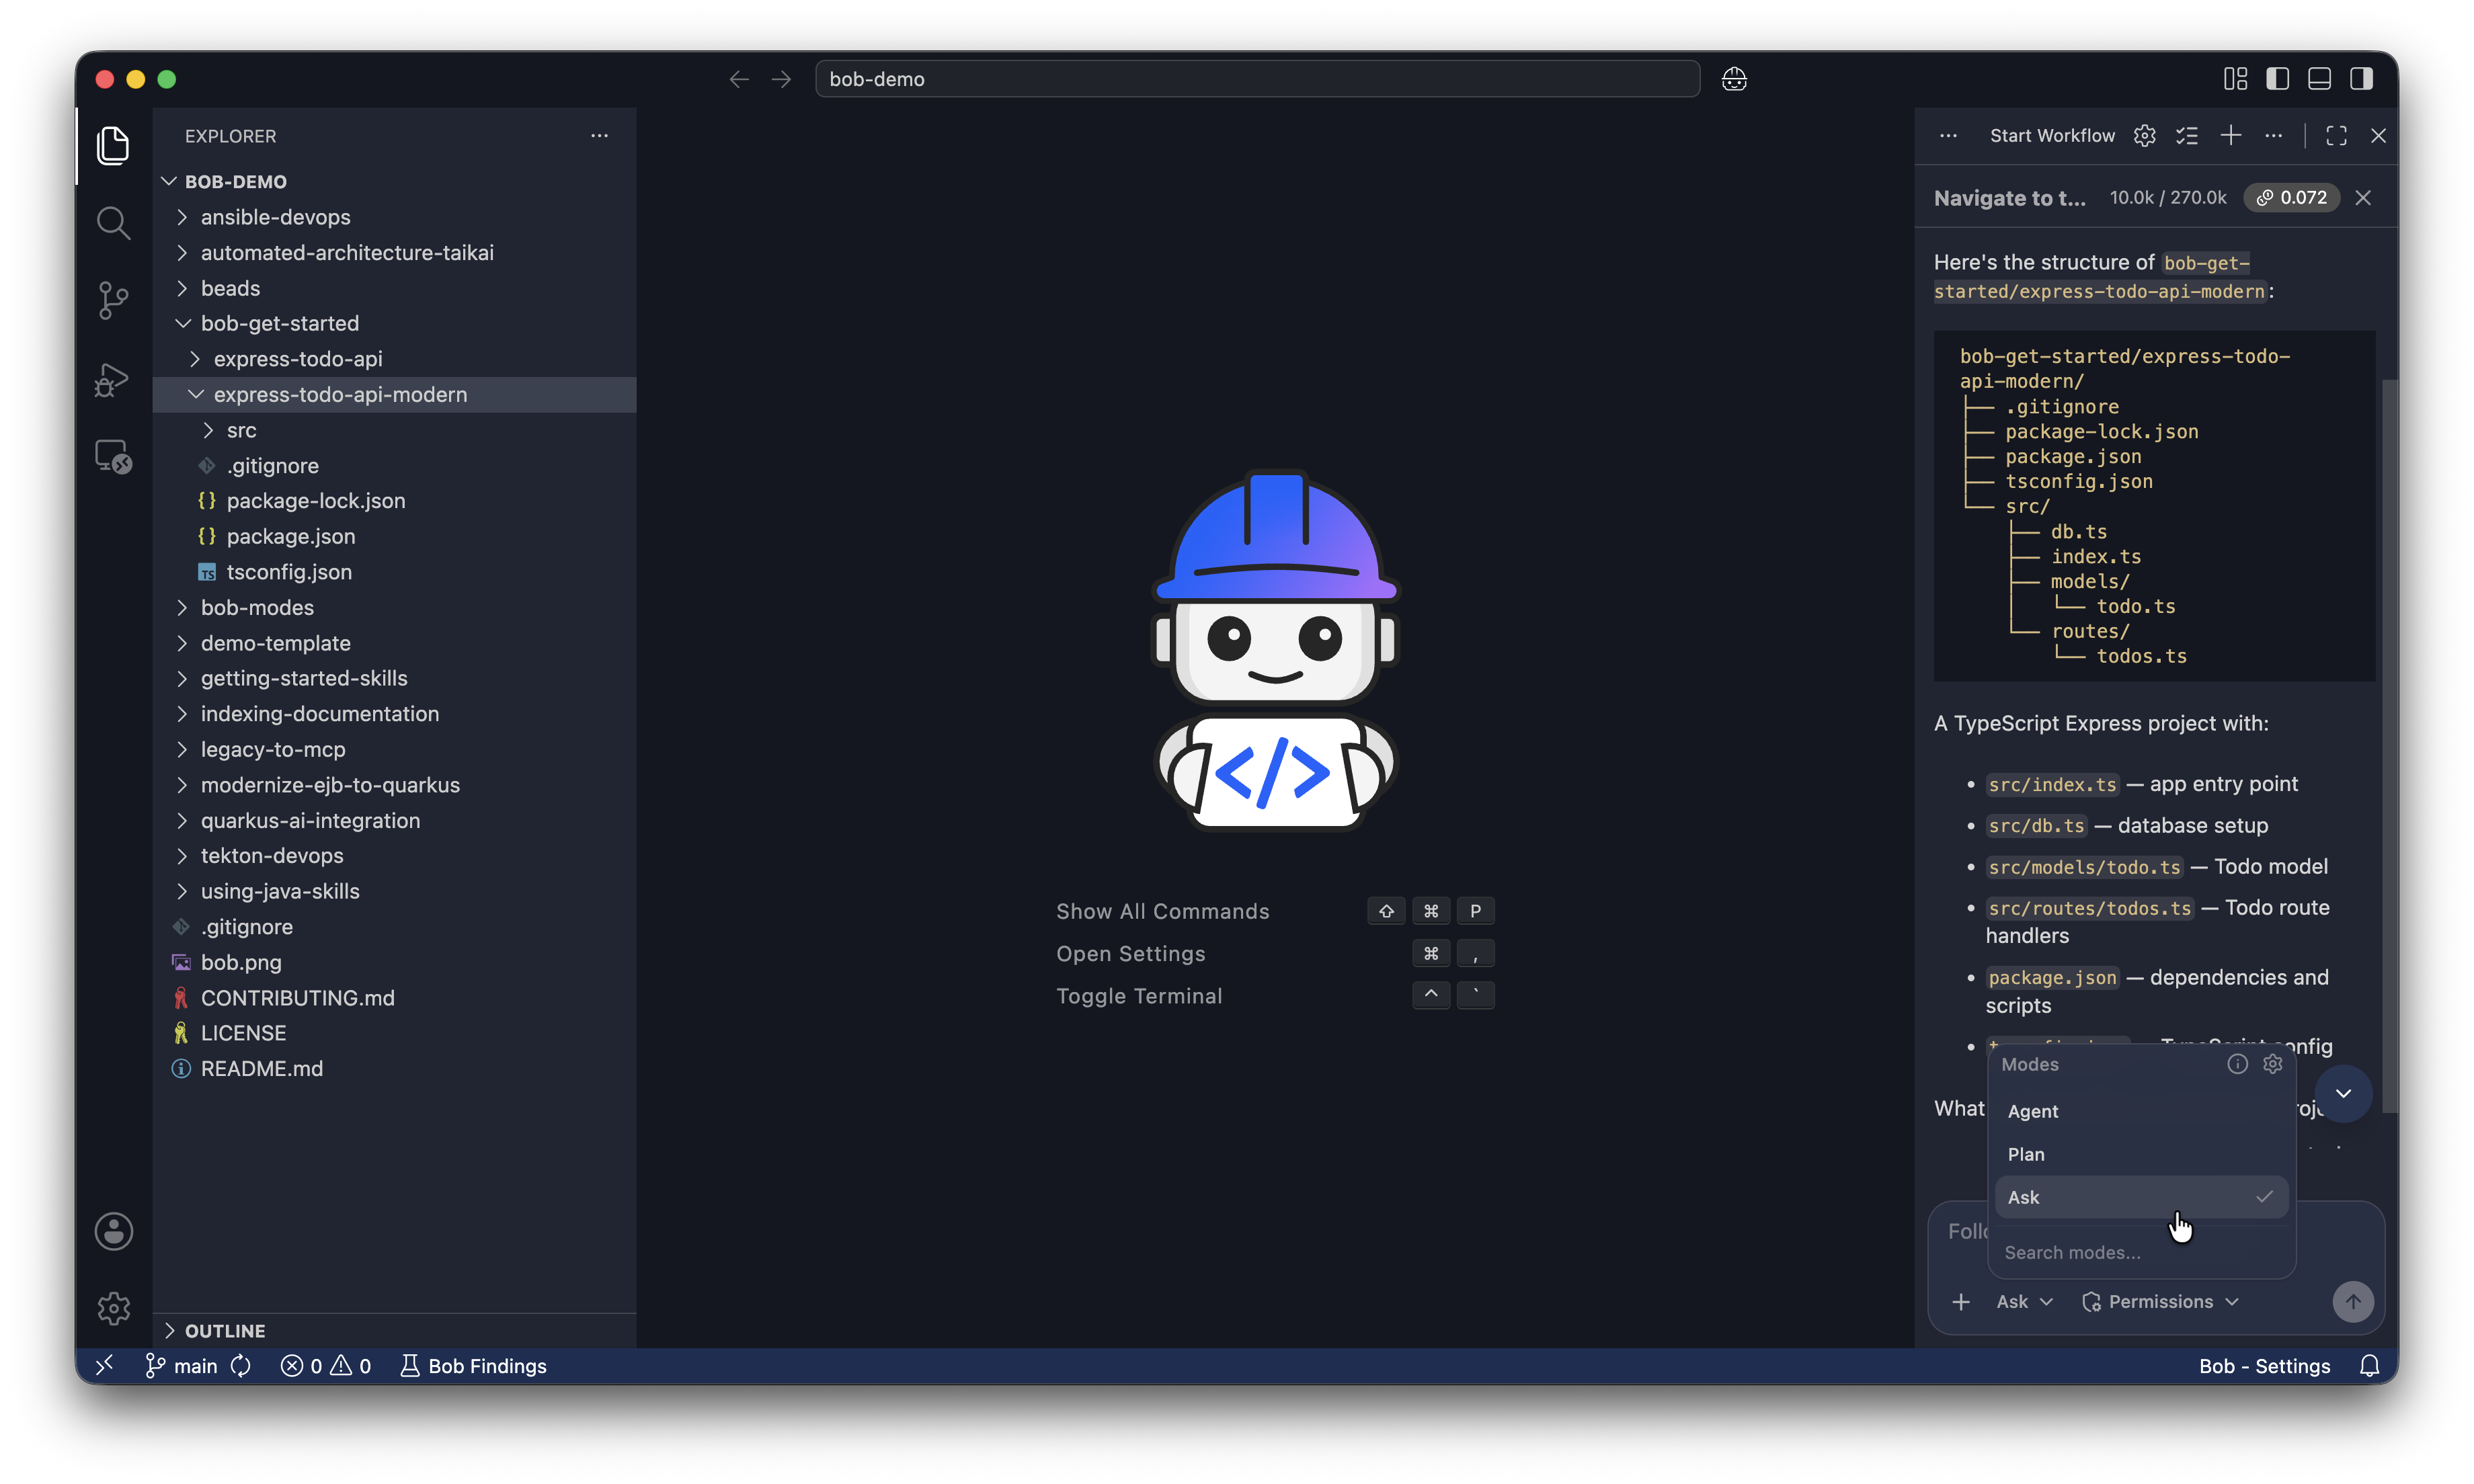
Ask mode can only read files, not write them. Bob can't change anything in this mode, so it's safe to explore. Modes are one way Bob respects the principle of least privilege.
Ask Bob to explain the project:
Explain what this application does and how it works.Bob reads through the project and explains what it does.
Run the API in Docker
Switch to Agent mode
Select Agent in the mode selector, or type /agent in the chat. Agent mode lets Bob write, modify, and refactor code. Bob still asks for permission before each operation.
Configure auto-approval
Find the auto-approval toggle in the bottom-right corner of the window under the Permissions menu. Make sure only Read is selected for auto-approval. Bob automatically runs read-only commands, but it asks for approval for any command that modifies files or runs in the terminal.

Initialize Bob in your project
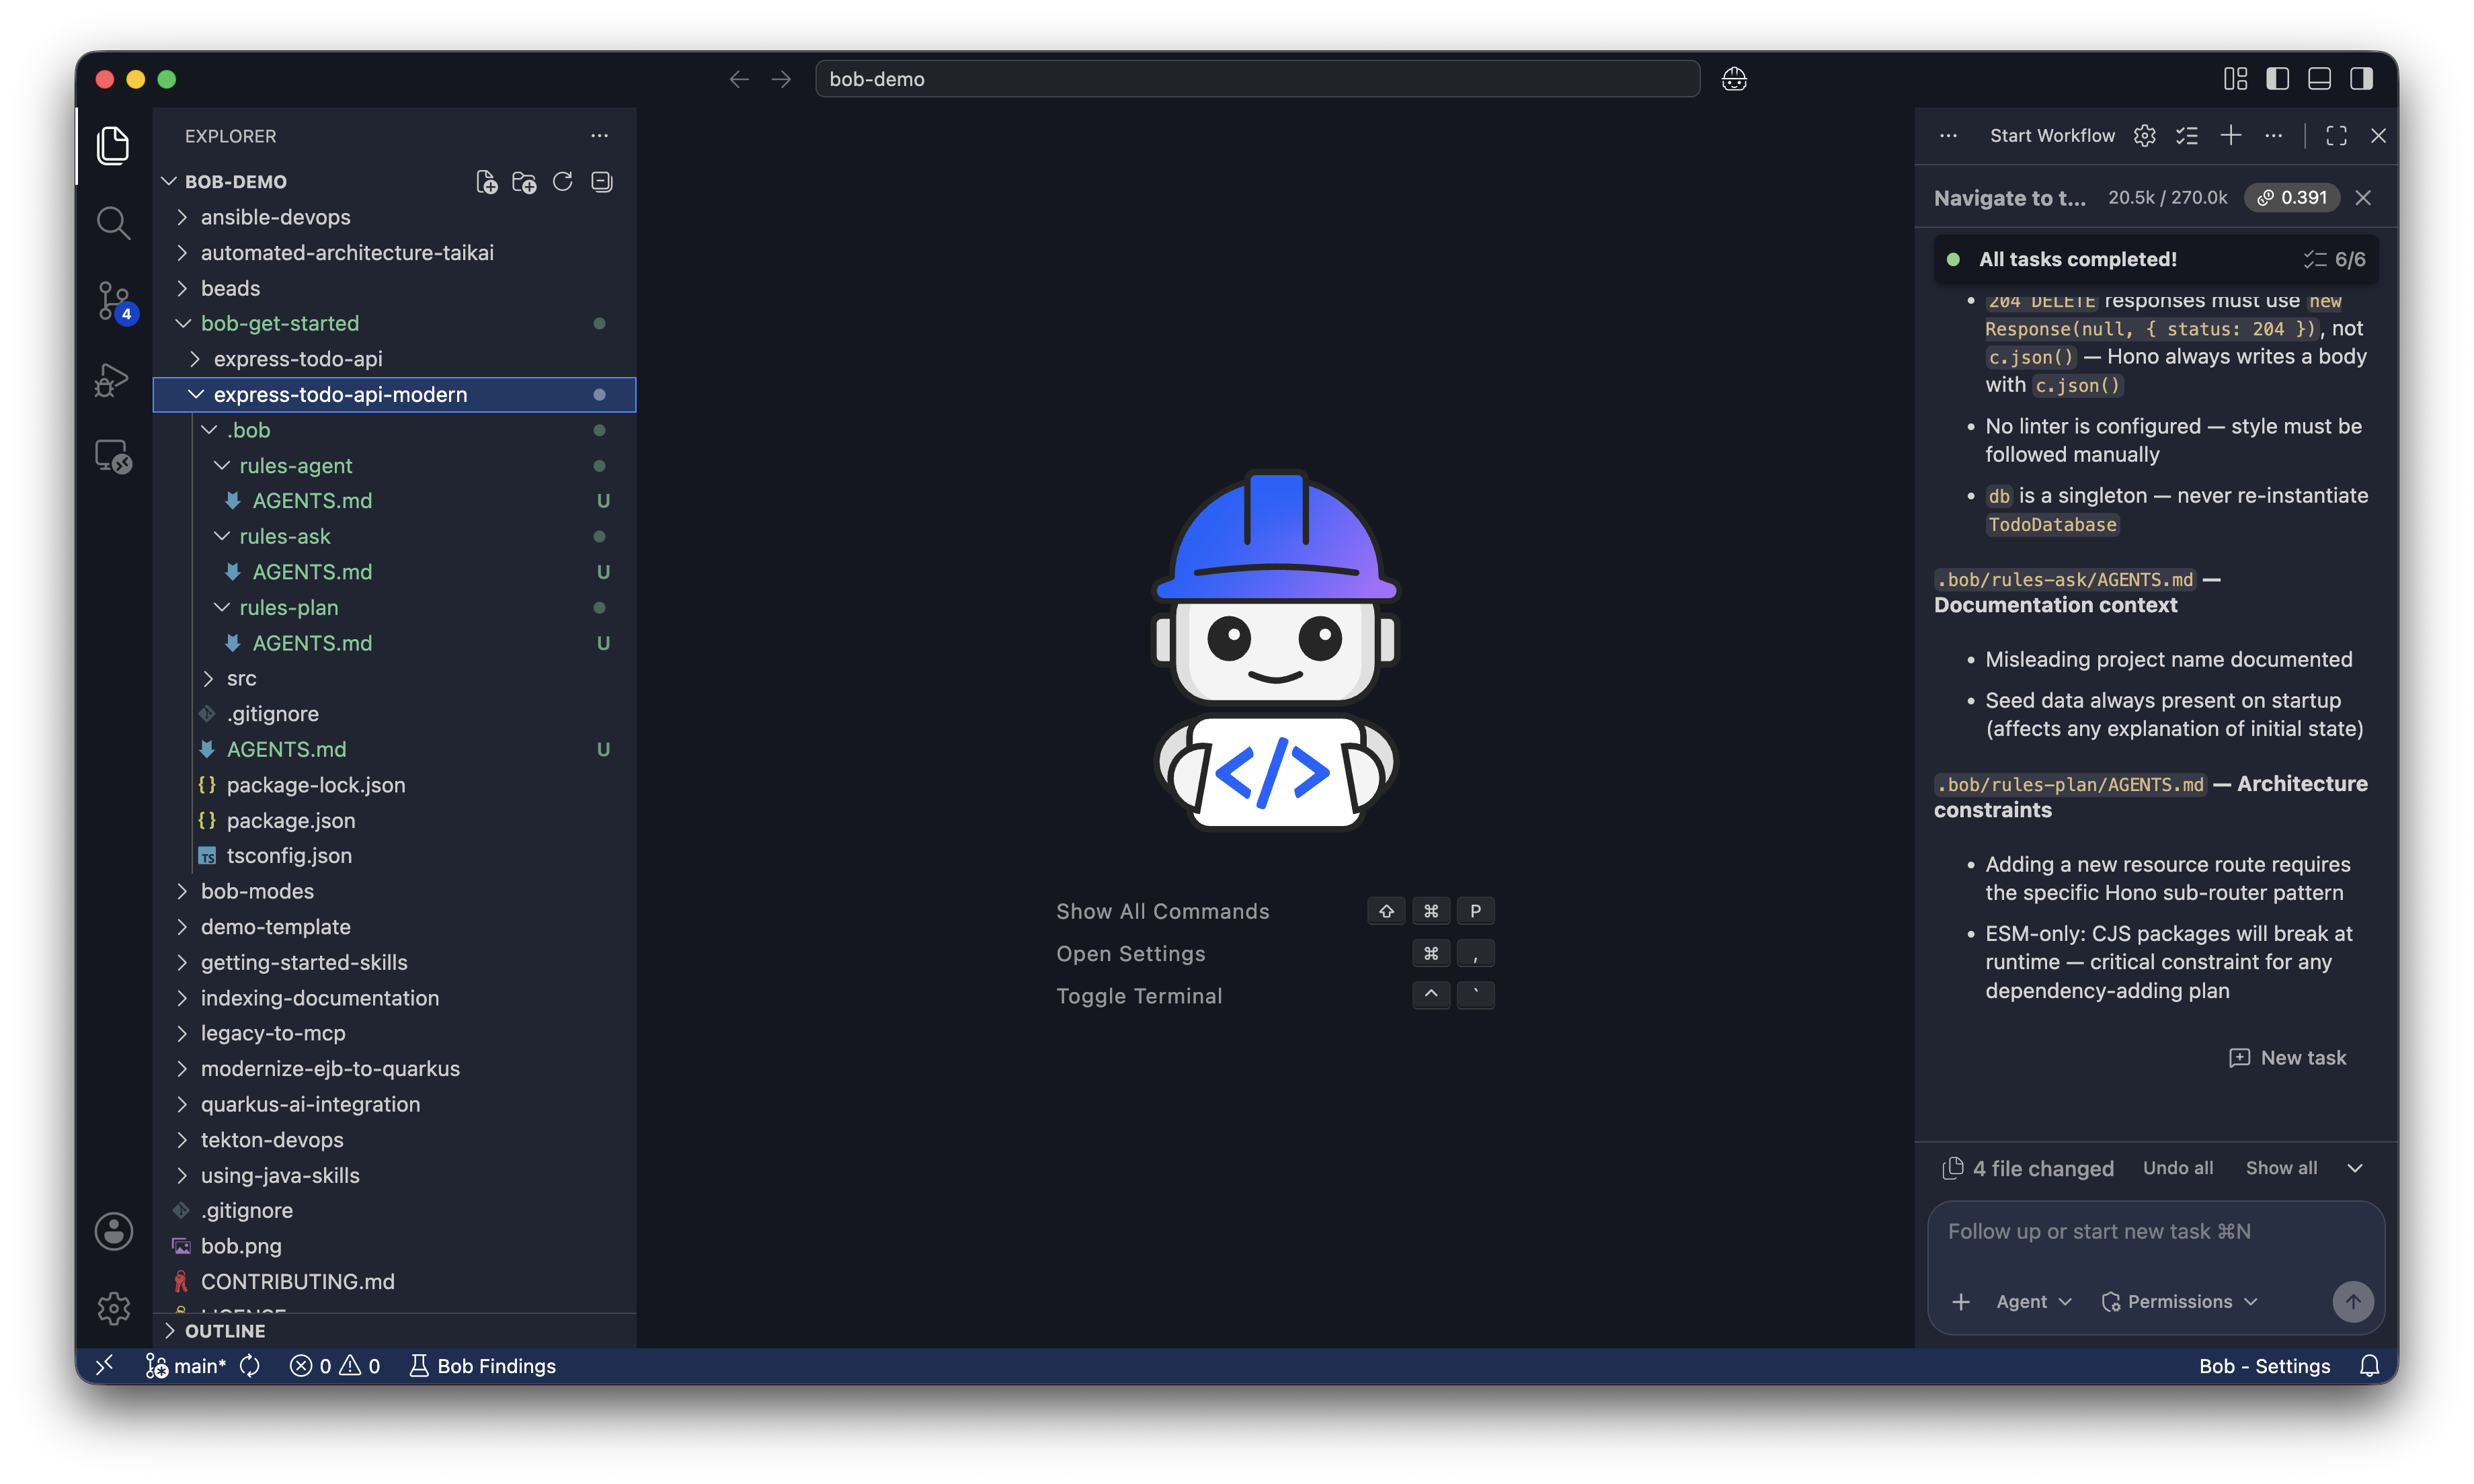
Run /init in the Bob chat panel to have Bob create a root AGENTS.md file and rule AGENTS.md files.
The root AGENTS.md file tells Bob the project's overall structure, conventions, and goals so Bob can write code that fits your project. Without it, Bob starts from beginning each time because Bob is stateless.
The rule files in .bob are where Bob creates AGENTS.md for each of its modes: Agent, Plan, and Ask. Each mode has a different set of rules that guide Bob's behavior in that mode.
/initBob asks for permission to create the AGENTS.md files. Click Approve todo tools for task to create the files. Once Bob creates all of the AGENTS.md files, you see the following files:
Build and run the API in Docker
Ask Bob to create a Dockerfile and start the container:
Create a Dockerfile for this API using Node 22 and run it on port 3000.
Don't install dependencies locally.
The Dockerfile handles all installations.

Once you create the Dockerfile, build the image and start the container.
Bob asks you to approve building the image and starting the container. Click Approve todo tools for task and Approve edit tools for task.
Because you only have Read auto-approval enabled, Bob asks your permission to run Execute commands. Click I understand the risks and then click Approve to allow Bob to execute commands for you.
Bob might find an NPM issue, such as the following one. Approve the fixes Bob proposes:
The build failed because there's no package-lock.json file.
I need to update the Dockerfile to use npm install instead of npm ci: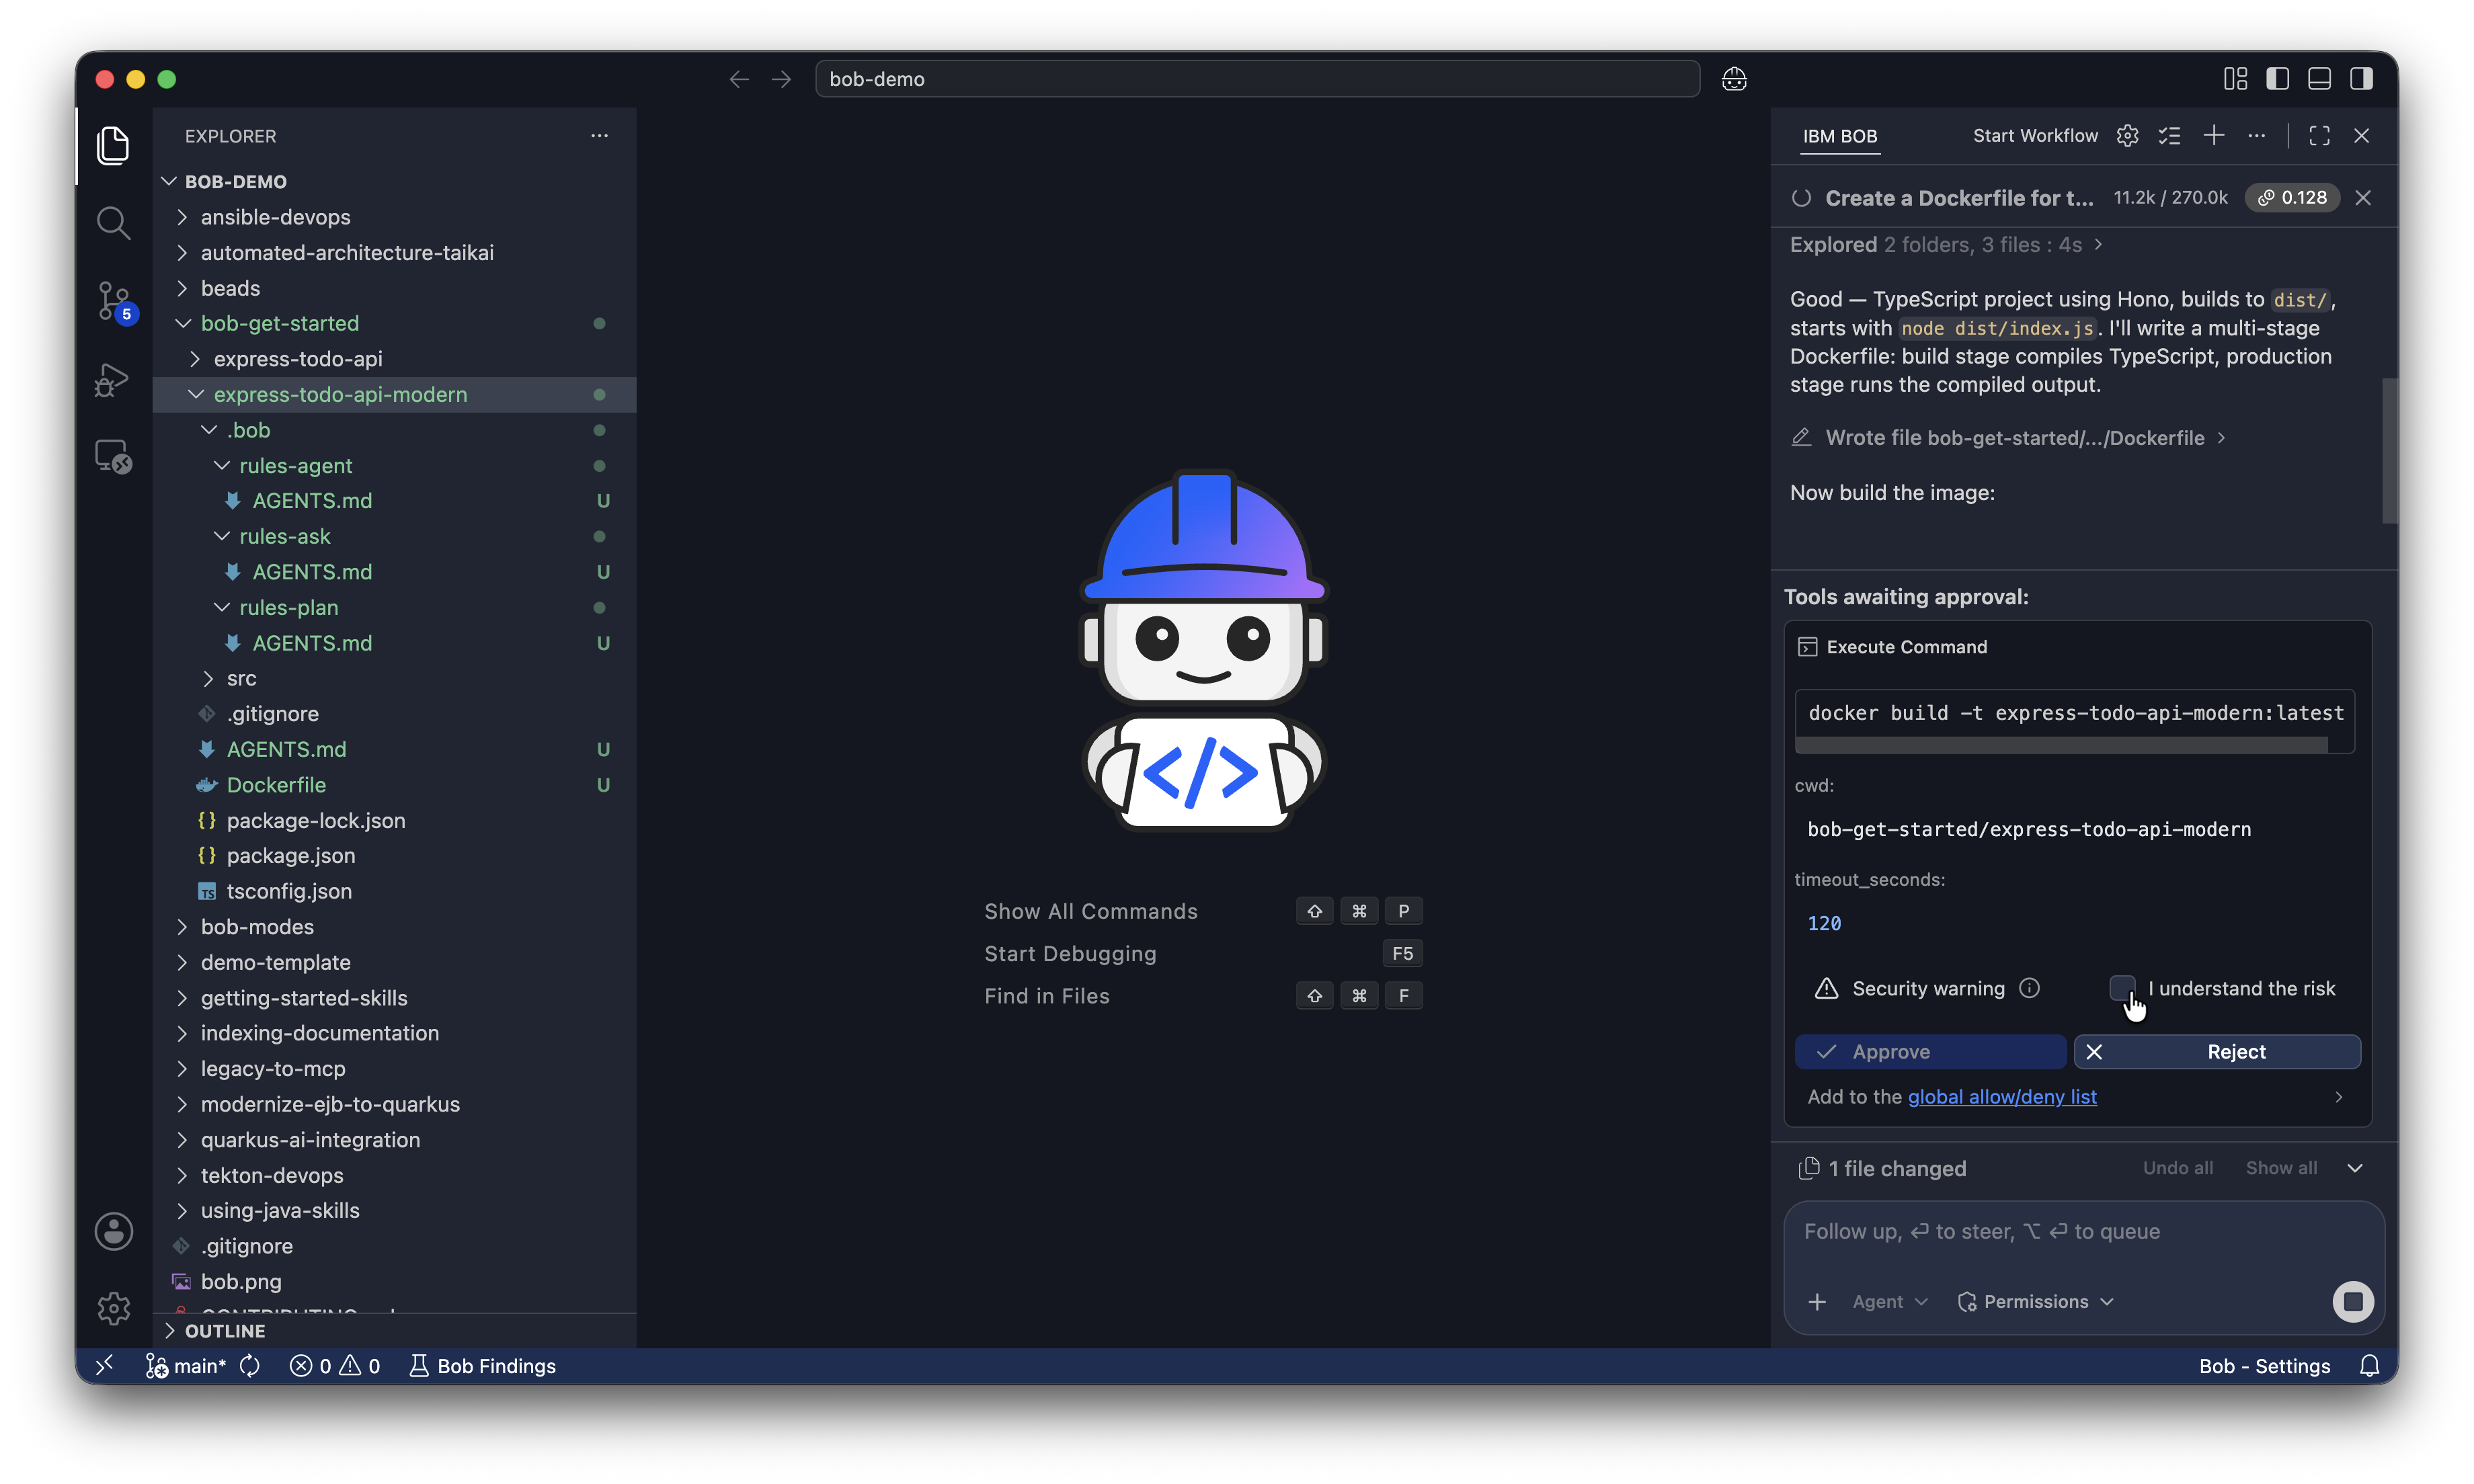
The API is now running and available.
Add a task to the to-do list
To test the API, paste the following command directly into the Bob chat panel. This command adds a task to the to-do list by making a POST request to the API:
curl -X POST http://localhost:3000/api/todos \
  -H "Content-Type: application/json" \
  -d '{"title": "Build a web UI"}'

  Give me the response in a table format with two columns: Field and Value
Bob shows you the response, which confirms you can add tasks to the to-do list with the API. Bob shows a response similar to the following:
| Field | Value |
|---|---|
| id | a9d24d57-d242-4ed6-96f7-bb9f3f8c39a8 |
| title | Build a web UI |
| completed | false |
| createdAt | 2026-06-08T17:22:39.643Z |
Stop and remove the container
Ask Bob to stop and remove the container. You build a new container with the web UI in the following section:
Stop and remove the running container and Docker image.Plan the web UI with Bob
Start a new conversation
Click the plus sign at the top of the chat interface to start a new conversation and clear the context window.
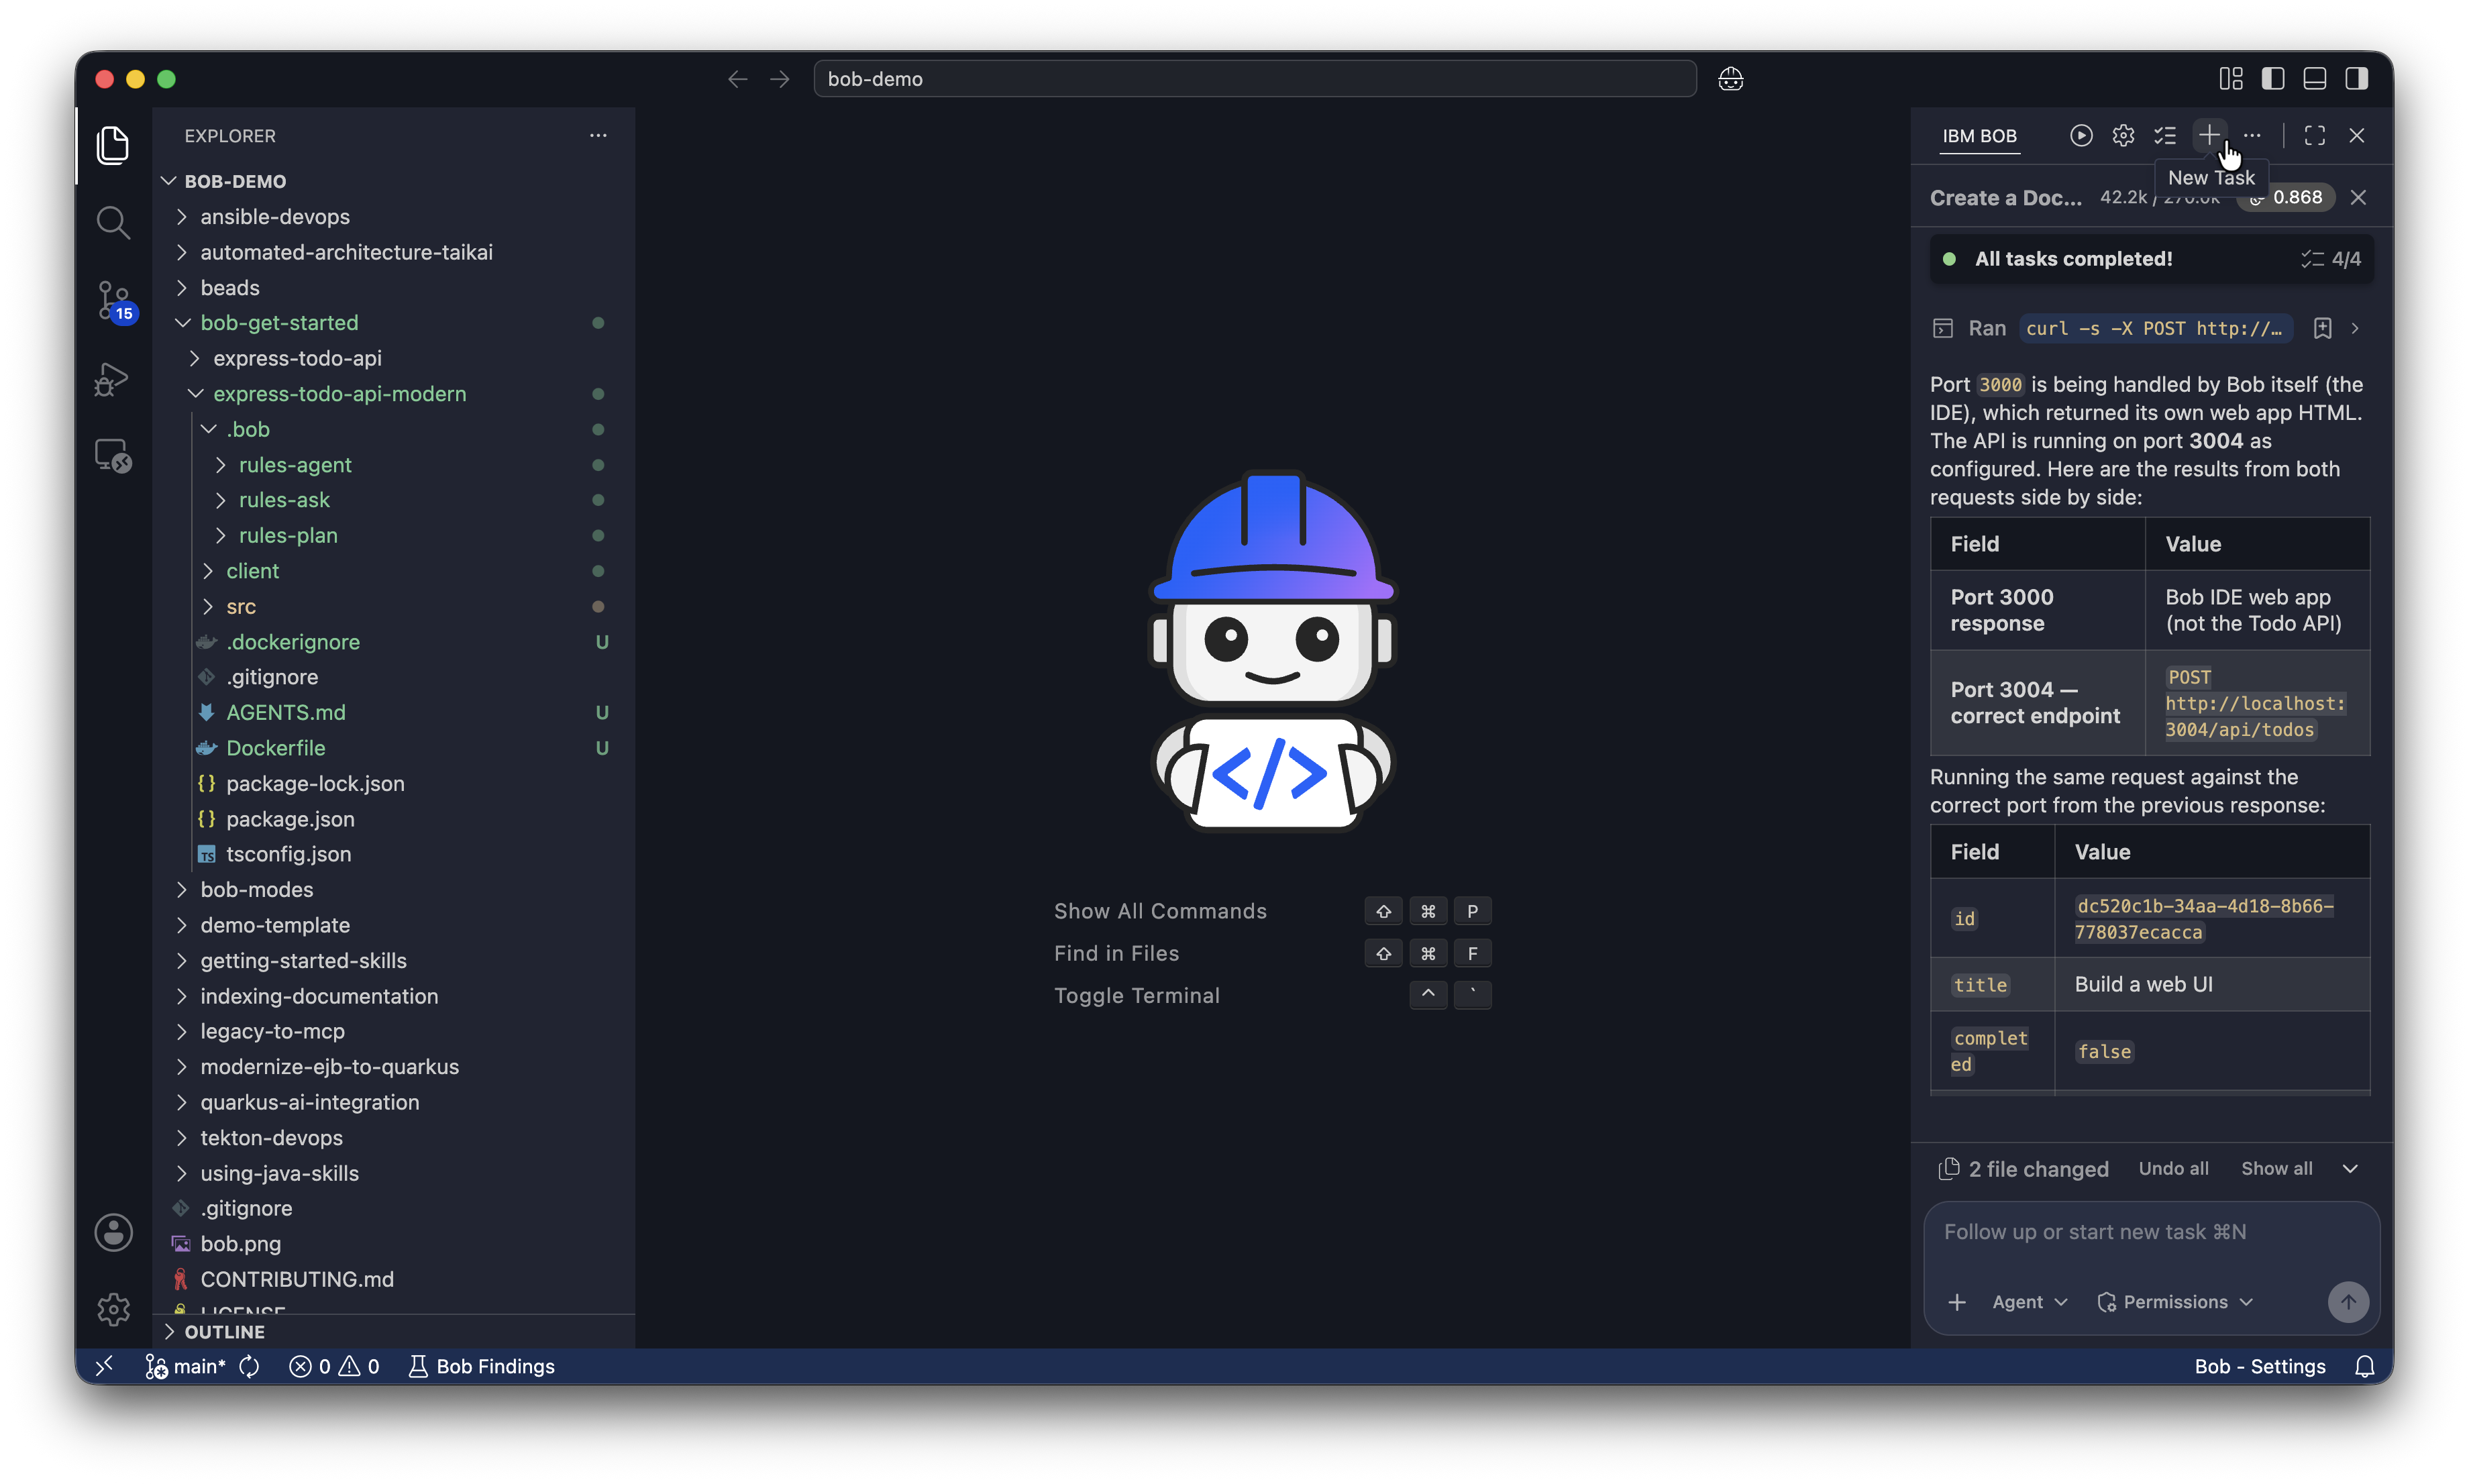
Starting a new conversation clears the context window, which:
- Prevents earlier planning discussion from consuming your token budget.
- Keeps the implementation context focused on the approved plan.
- Reduces the risk of Bob conflating planning and implementation instructions.
Plan the web UI
Before modifying code, switch to Plan mode so Bob can create a plan on how it builds the web UI. Click the mode selector dropdown and select Plan, or type /plan in the chat.
Ask Bob to plan the web UI ui-plan.md in the express-todo-api-modern project directory. Bob asks to use skill tools and subagents to create the plan. Click Approve skill tools for task to allow Bob to use the skill tools, Approve subagent tools for task to allow Bob to use subagents, and Approve edit tools for task to save the plan.
Make a plan to add a React TypeScript web UI to this todo app using Vite.

The UI needs to:
- Display all existing tasks fetched from GET /api/todos
- Add new tasks using POST /api/todos
- Mark tasks as complete or incomplete using PUT /api/todos/:id

Constraints:
- Do not modify the existing Express API or its endpoints
- Serve both the API and React frontend from a single Docker container using a multi-stage build
- Keep the implementation simple: no authentication, no client-side routing, no external state management library
- run `npm install` inside the Dockerfile

Save the plan to a file named `ui-plan.md` in the express-todo-api-modern project directory.
Bob may ask clarifying questions to better understand the requirements. You can either answer the questions, or tell Bob to do what it recommends.
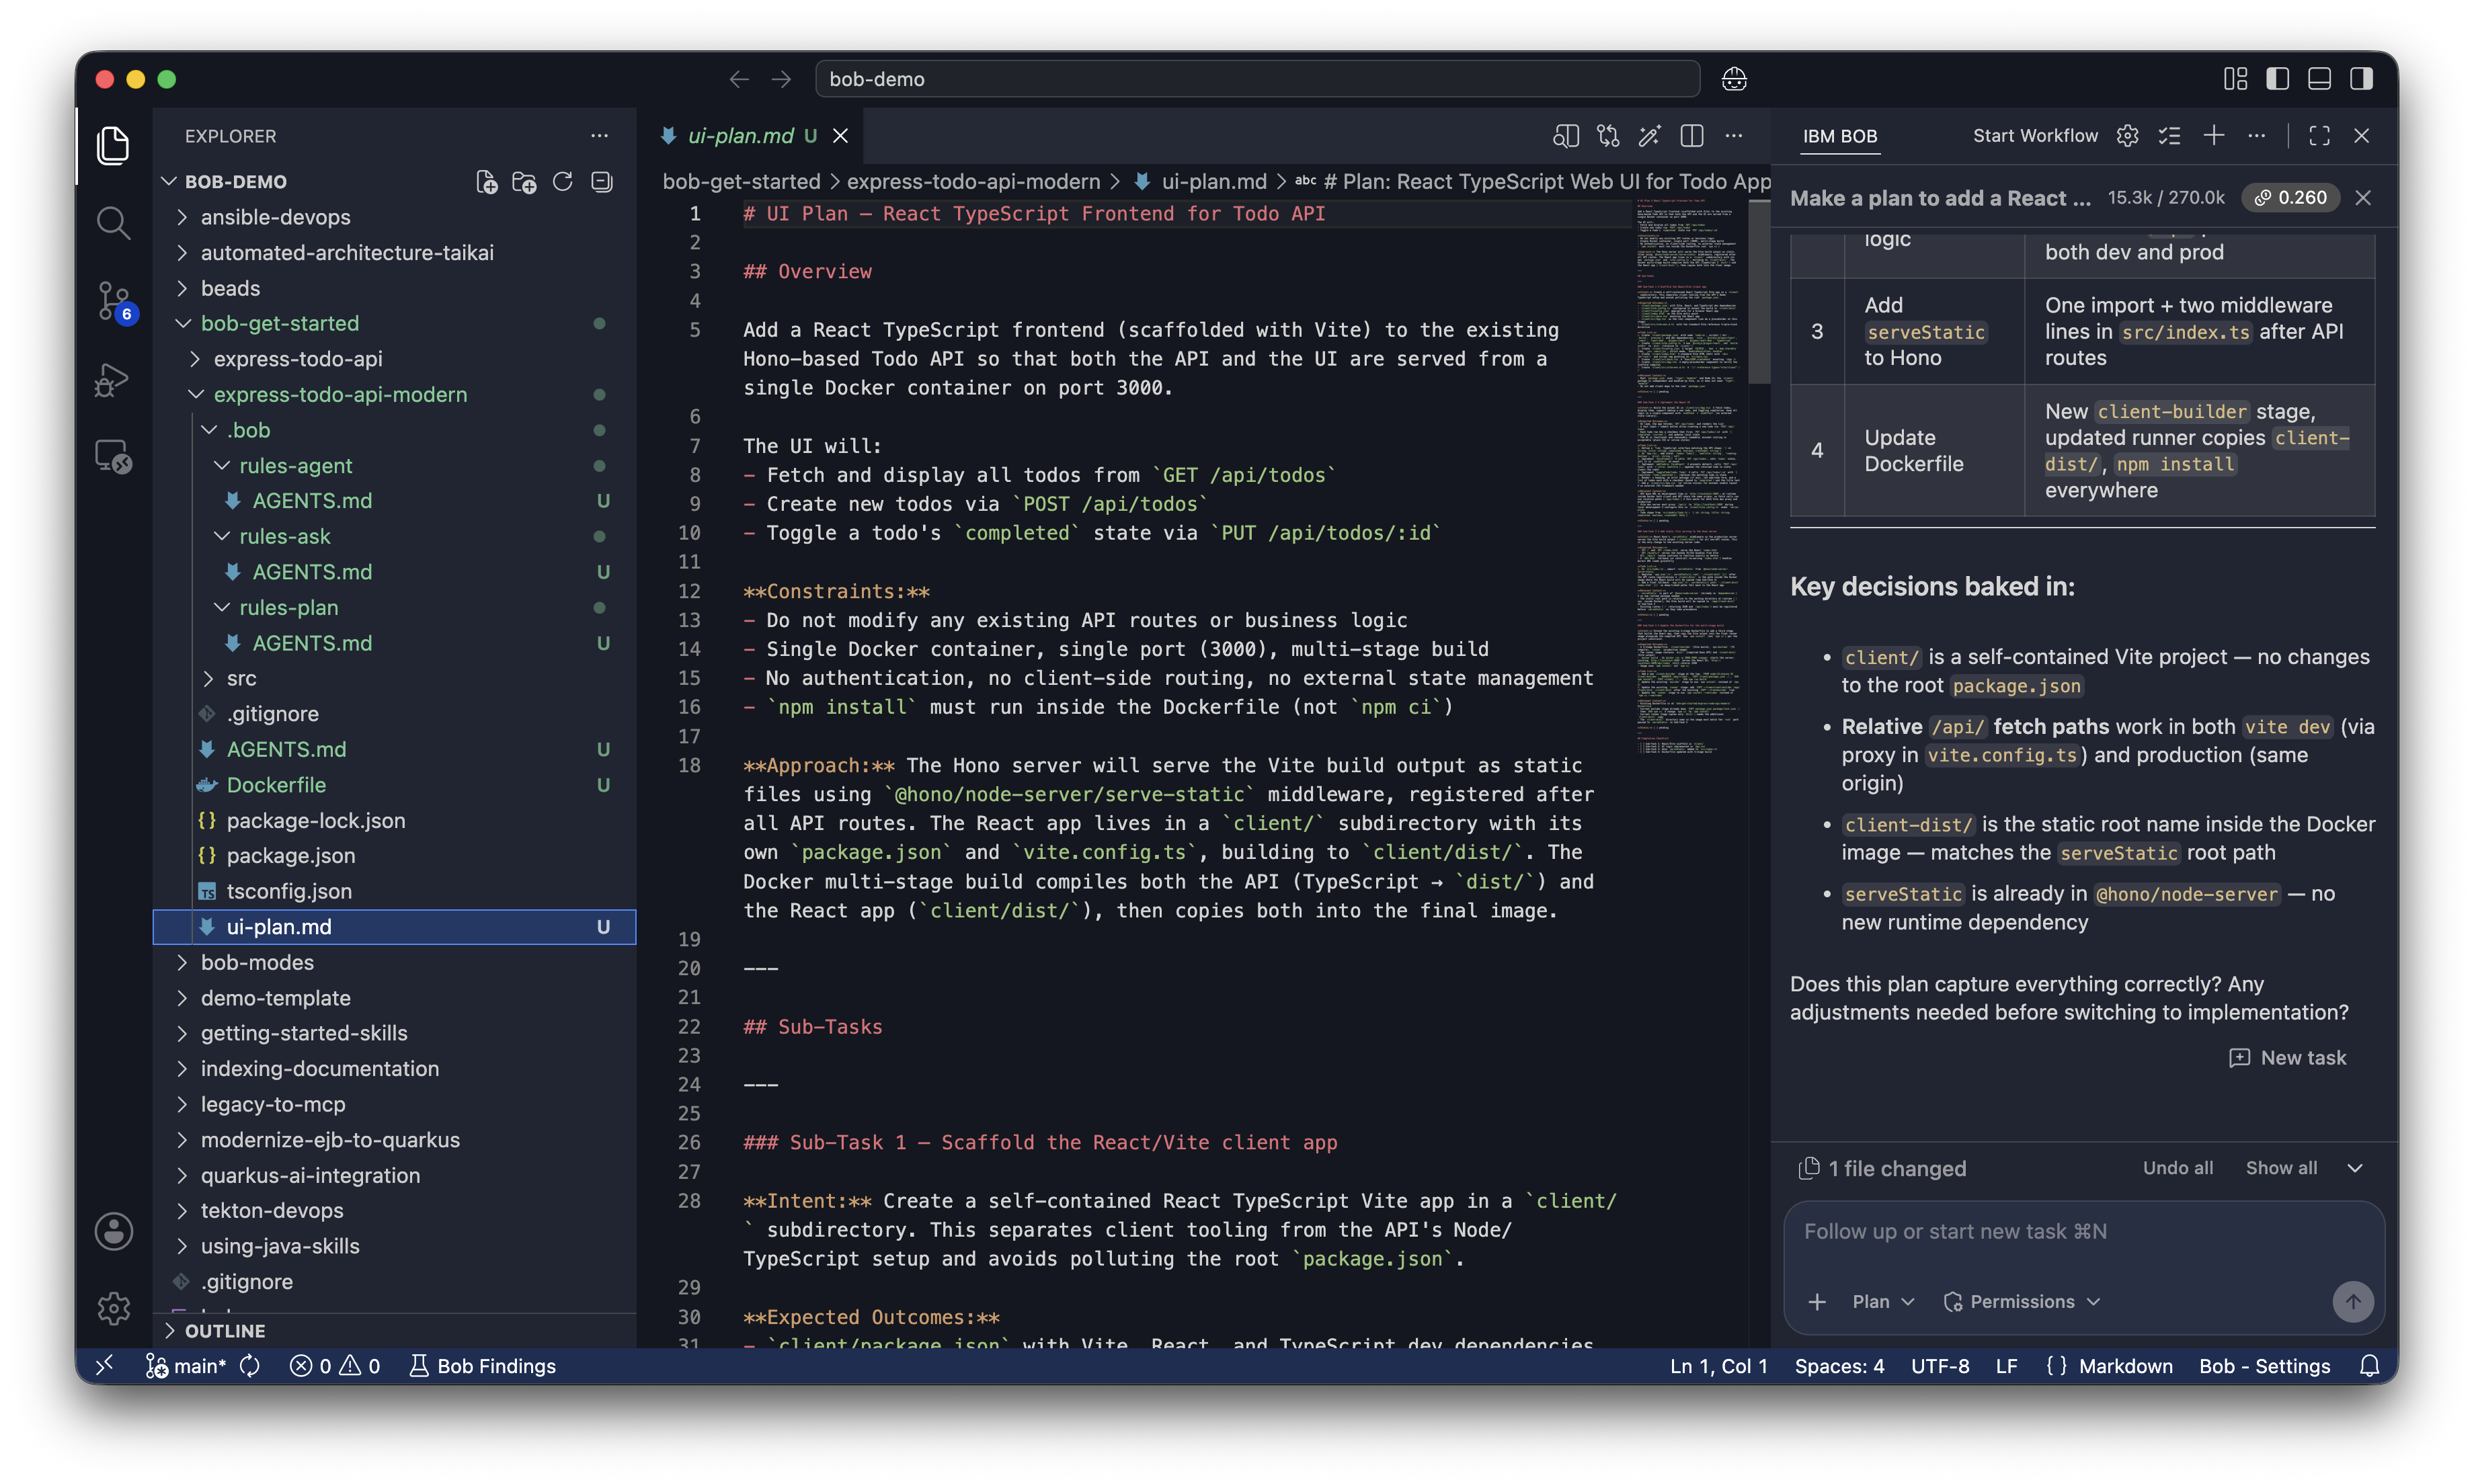
Review the plan before telling Bob to run it. Click ui-plan.md in the explorer to open it.
Build a web UI with Bob
Ask Bob to build the web UI
Switch Bob to Agent mode by clicking the mode selector drop-down and selecting Agent, or type /agent in the chat.
Ask Bob to build the UI, containerize it, and run it:
Implement the plan `ui-plan.md` you outlined to build the web UI
containerize the application with Docker, and run it.
Don't install dependencies locally. The Dockerfile handles all installations.
Bob reads the ui-plan.md, shows you the files it will create or change, and then builds and starts the container. Click Approve from Bobs tool requests.
Because you only have Read auto-approval enabled, Bob asks your permission to run Execute commands. Click I understand the risks and then click Approve to allow Bob to execute commands for you.
Fix build failures
Sometimes Bob's first attempt at building the UI and container might fail due to errors in the code or Dockerfile. Bob shows you the error message and proposes a fix. Development iteration is part of writing code with Bob.
The following are some possible errors and fixes you might encounter:
The build failed because `npm ci` requires a package-lock.json file.
Let me update the Dockerfile to use `npm install` instead.
Vite can't find index.html. The issue is that index.html is in the `public` directory
but Vite expects it in the root. Let me move it to the correct location.Open the web UI in your browser
Once the container is running, Bob gives you a summary of what it completed.
Open http://localhost:3000/index.html in your browser. Try adding a new task using the input field to confirm the API is working correctly.
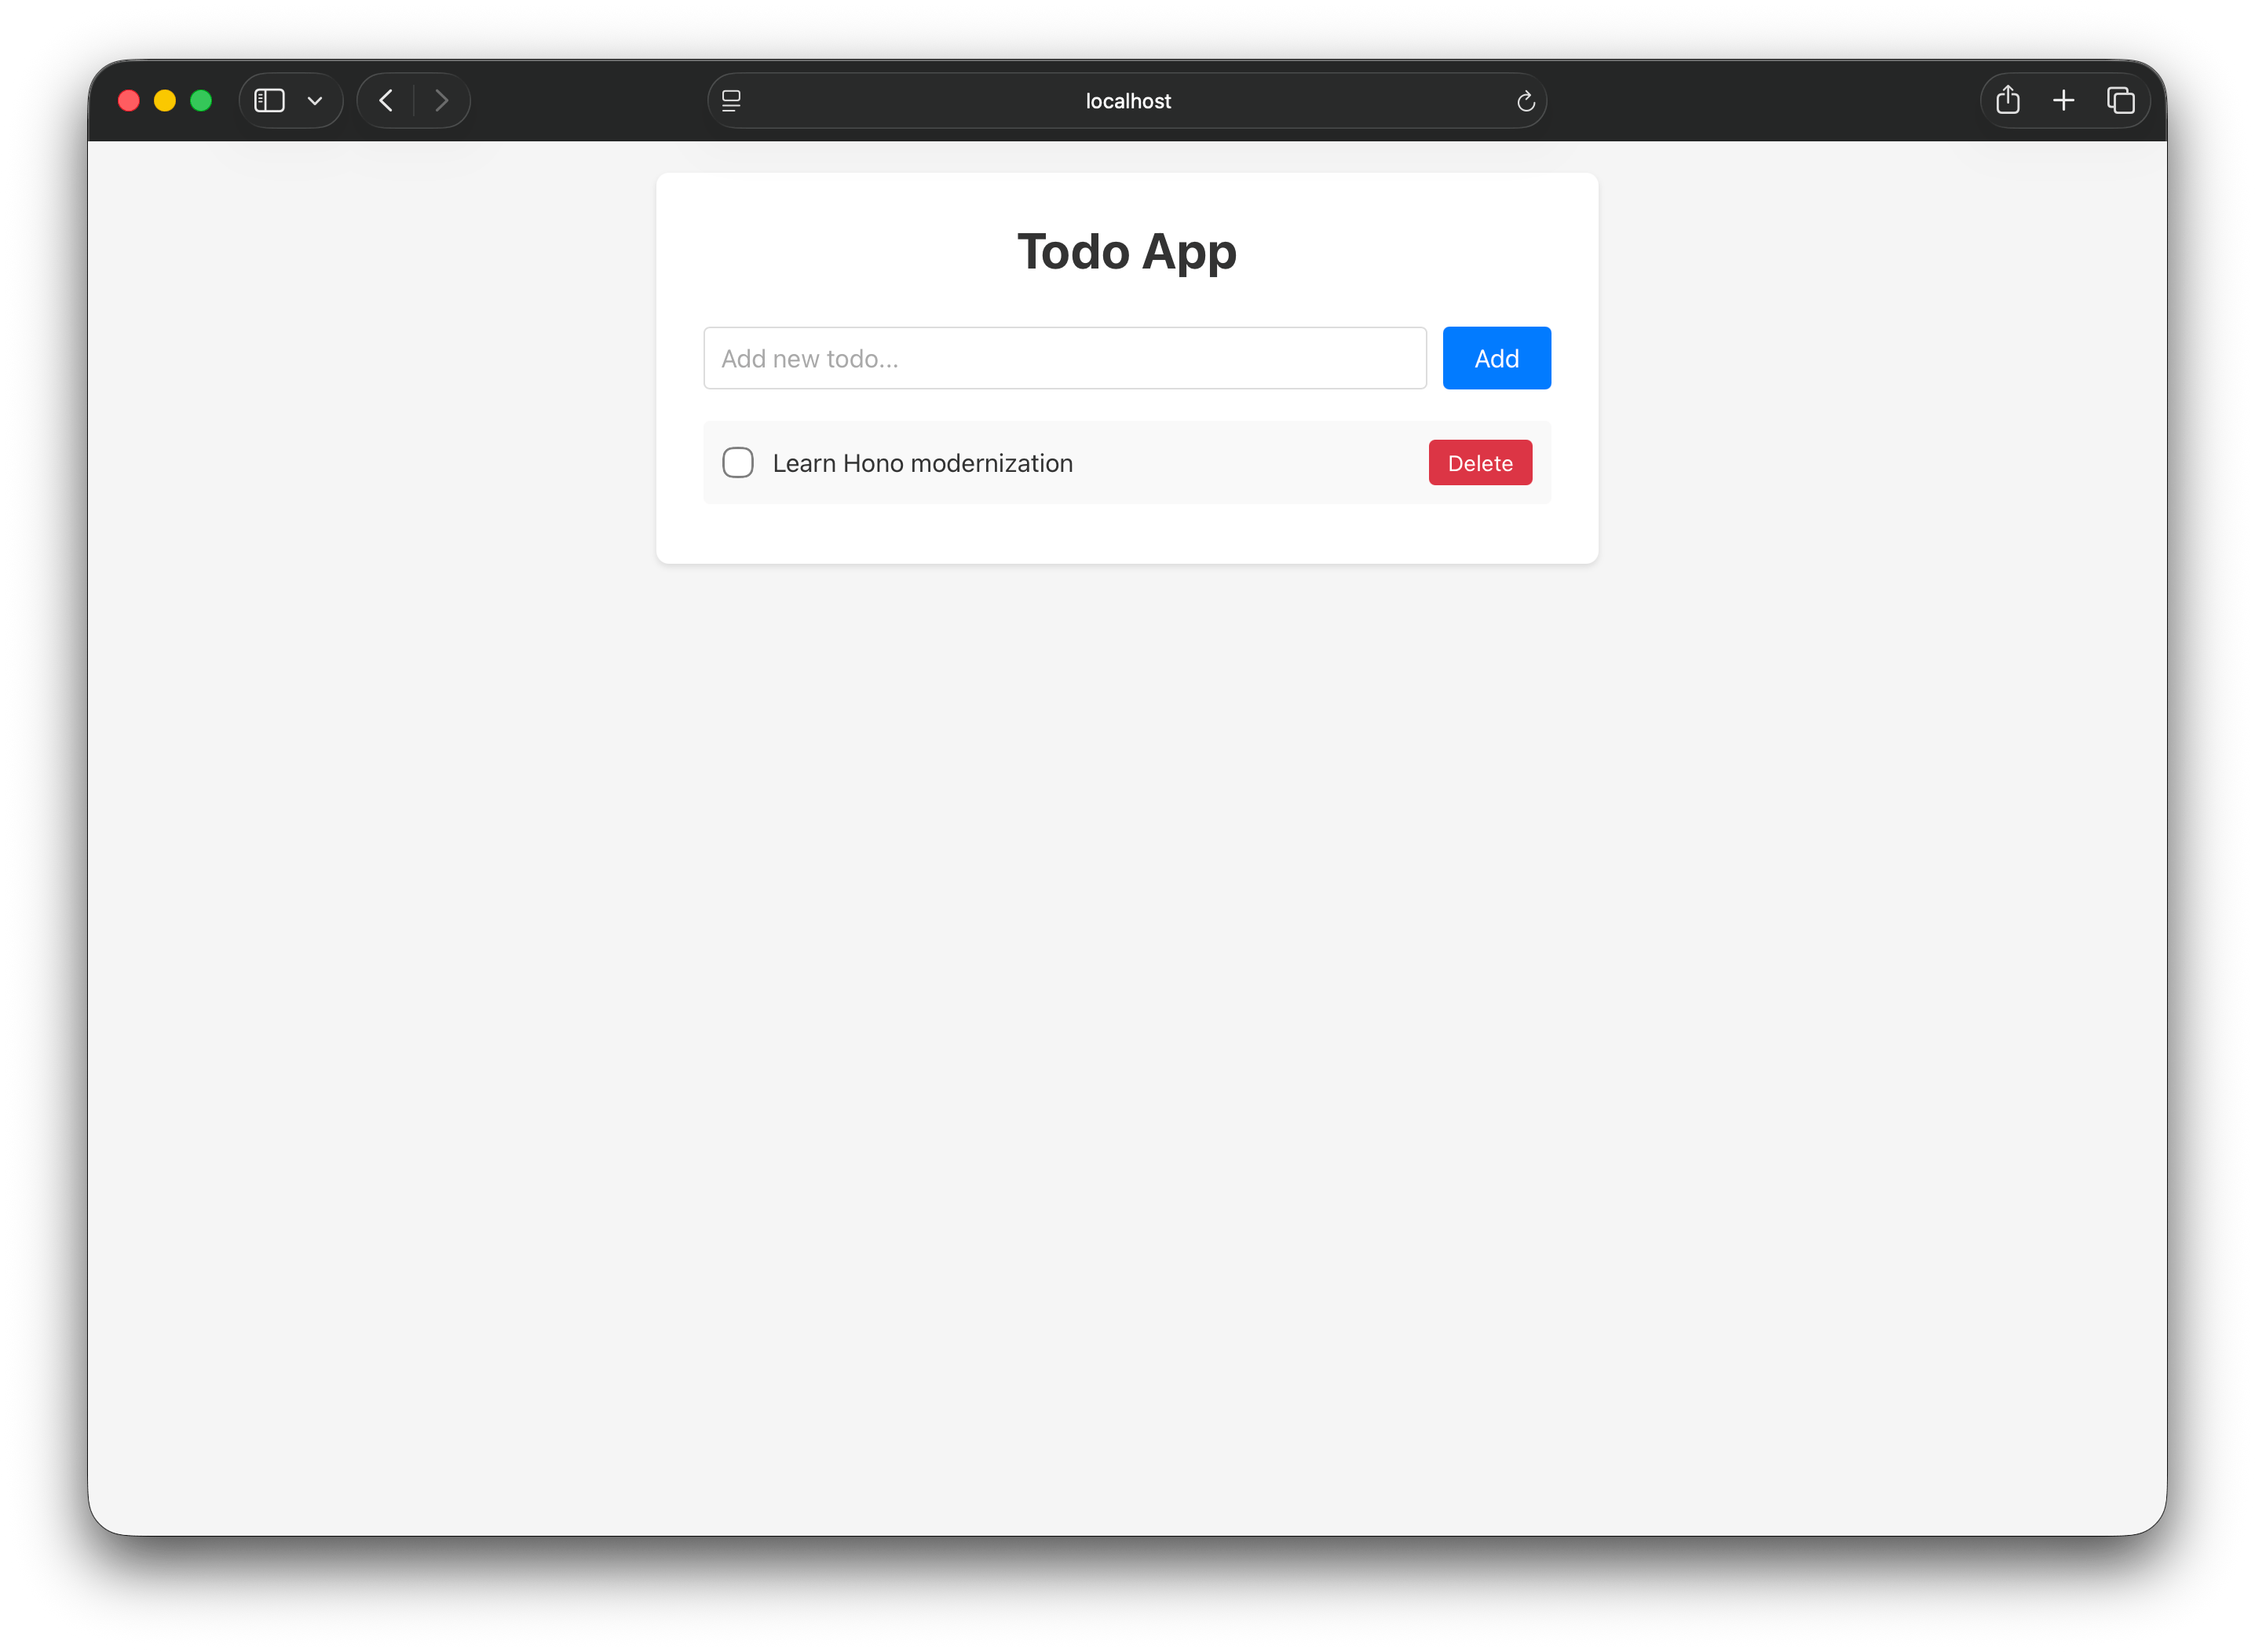
Customize the UI
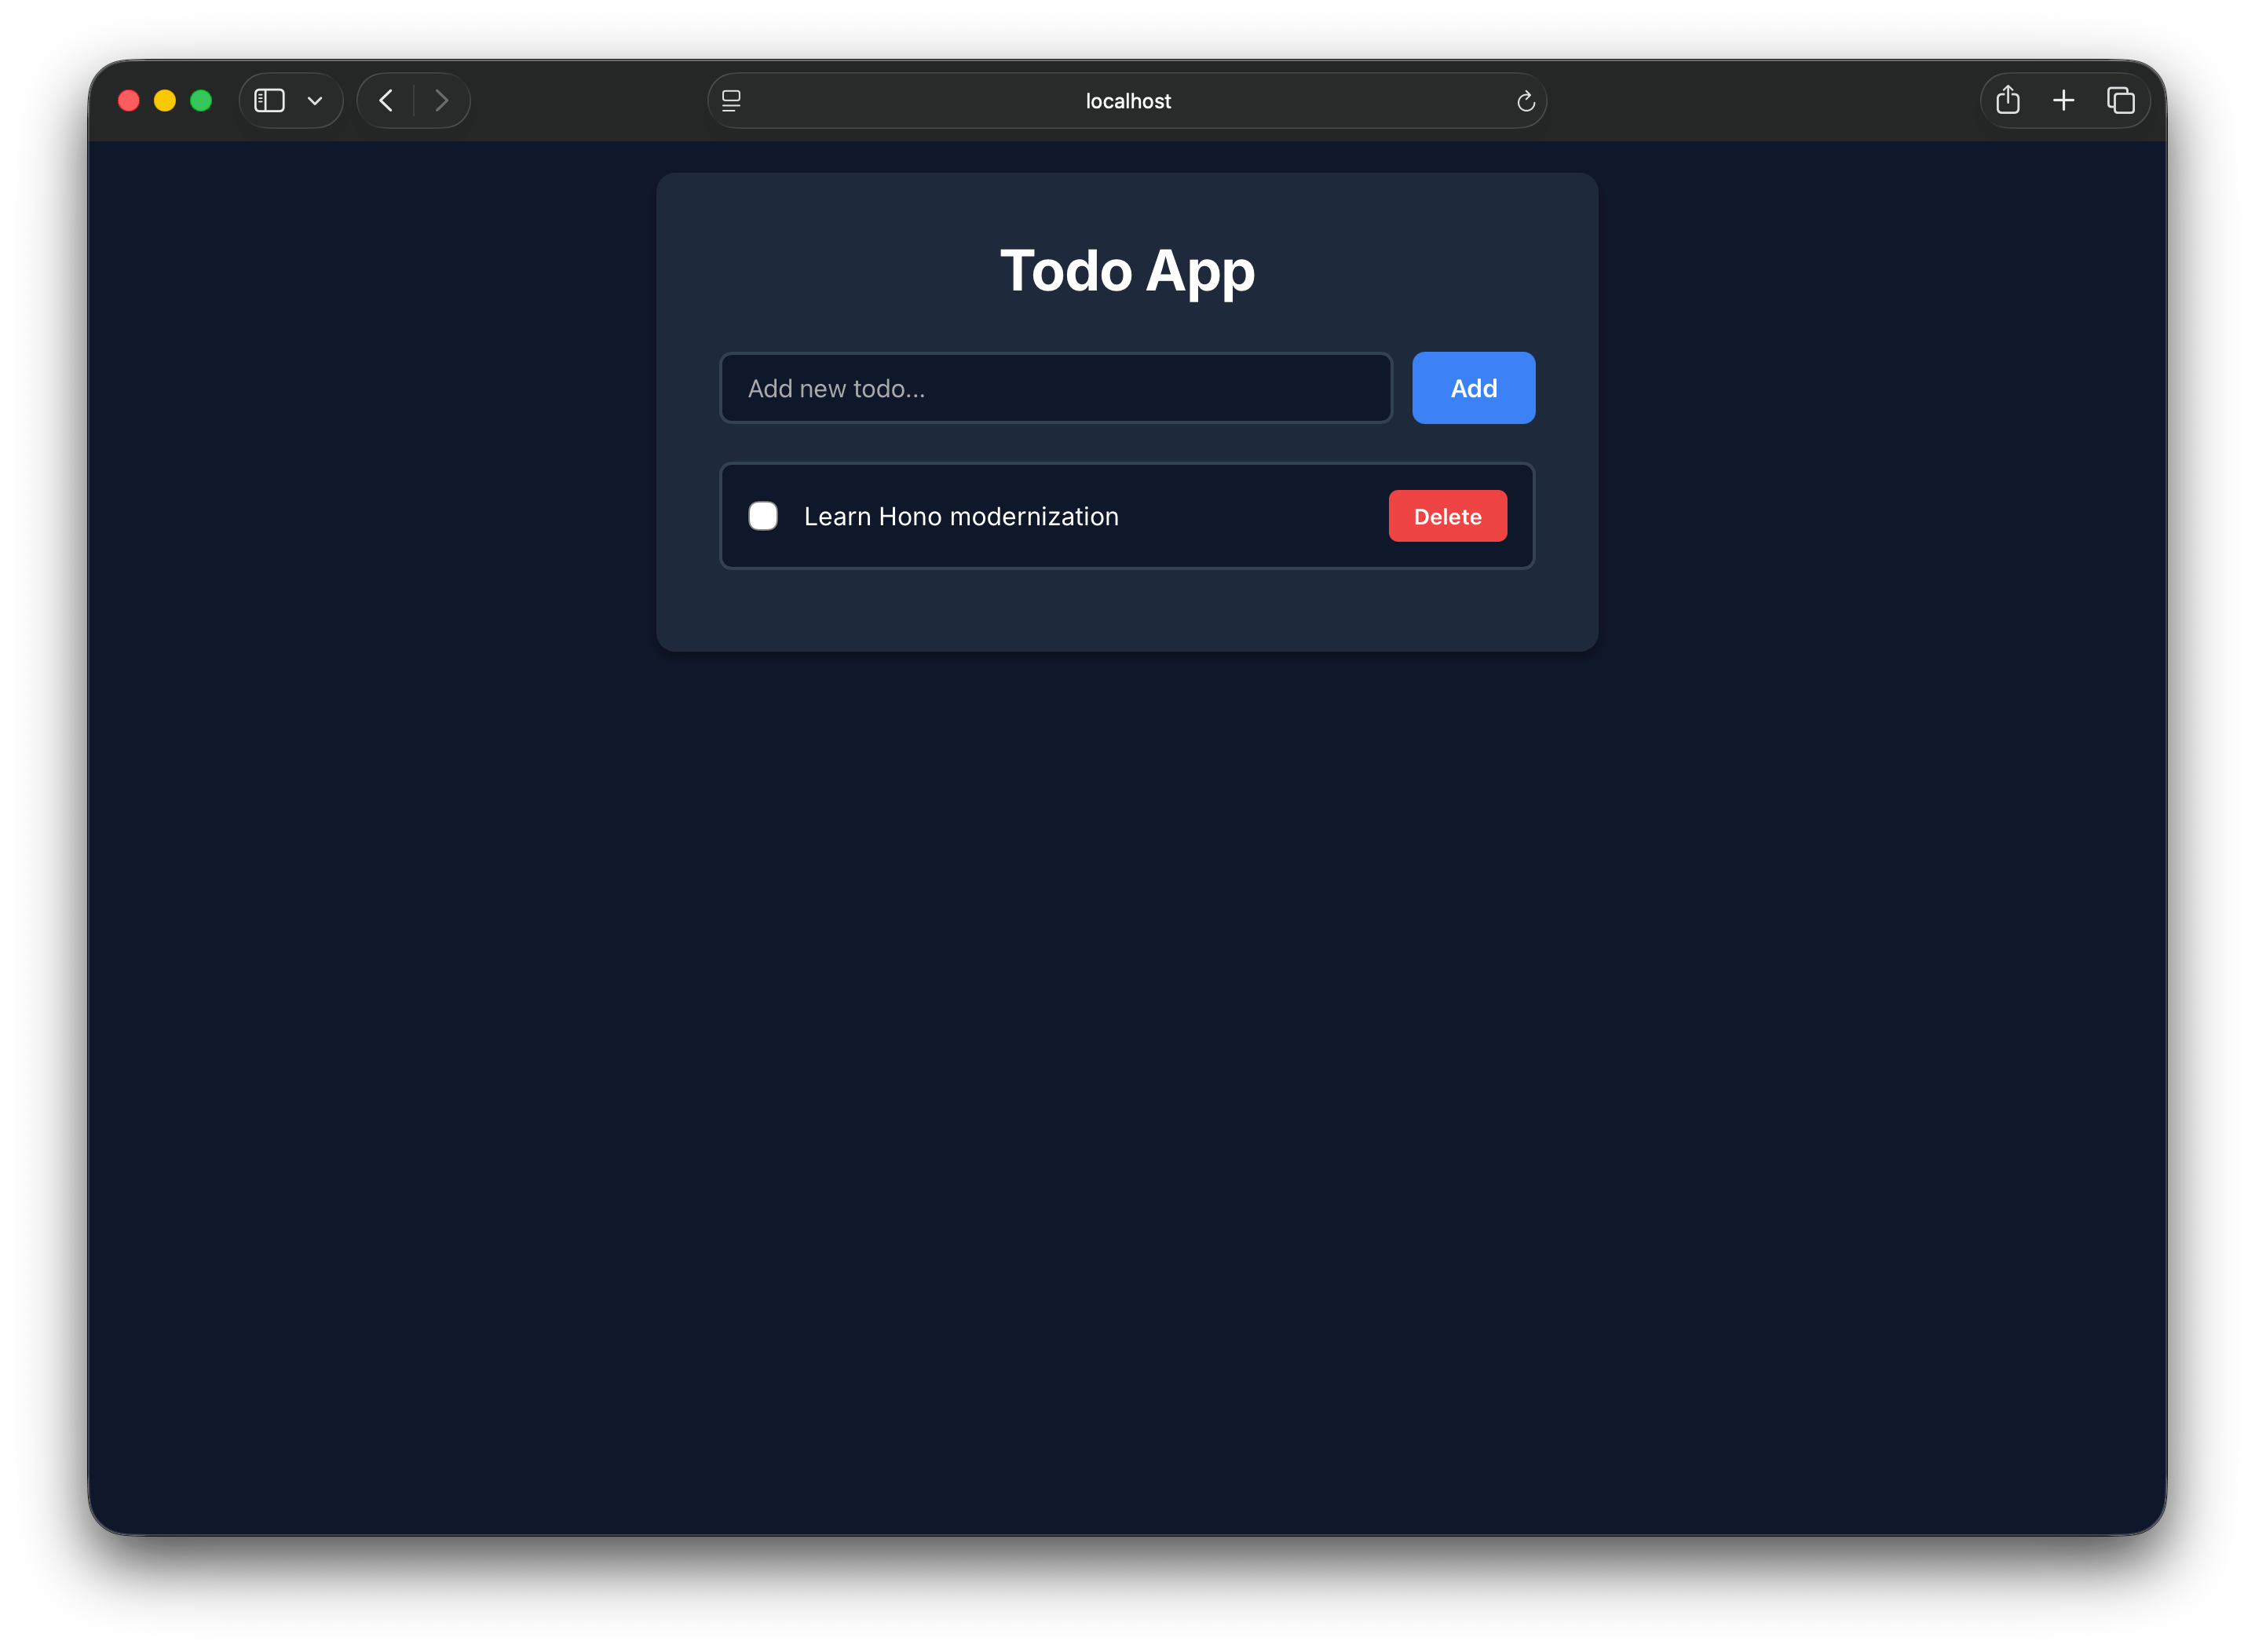
Ask Bob to update the styles
Personalize the UI by telling Bob what font, font color, and background color you want. The following are some fonts you can choose from:
- Inter: A popular choice for web apps
- Georgia: A classic serif font, which is warm and readable
- JetBrains Mono: A monospace font with a developer-tool feel
Pick a font color and background color. In the Bob chat panel, describe your choices using natural language. The following is a customization example:
Update the styles of the web UI.
Use the Inter font.
Dark navy background.
White text.
Bob proposes edits to the React component styles. Review the diff and click Save to accept the changes.
Rebuild the container and view your changes
The running container still serves the old styles. Ask Bob to rebuild and restart it so you can see your changes:
Rebuild the Docker image and restart the container with the updated styles.Refresh http://localhost:3000/index.html in your browser to see the updated design.
Because this API stores its data in memory, when you rebuild the Docker container, the to-do list resets to the default tasks. In a real application with a database, your data would persist through container rebuilds.
Clean up
When you're done, ask Bob to stop and remove the container:
Stop and remove the running container and the Docker image.Bob asks for approval to run the commands and confirms when the container and image are removed.
Next steps
In this tutorial, you used Bob to build a web UI for an existing Express API and ran the result in Docker. You used Ask mode to safely explore the project, Plan mode to review Bob's approach, Agent mode to build and customize the UI, and the approval workflow to stay in control of every change. Continue building on what you learned with the following resources:
- Read the Bob security guidance to learn how to safely operate Bob and protect your code and credentials.
- Read Bob best practices to learn effective prompting, mode selection, and workflow strategies for using Bob.
- Explore the Bob get started tutorials to learn more about Bob's capabilities.
- Follow the modernize a Node.js Express API tutorial to practice using Bob on a real refactoring task.